Kubernetes in Hetzner Cloud with Rancher Part 2 - Node Driver
 Published
(Update Aug 9, 2021: I have built a tool that can deploy a Kubernetes cluster - also highly available if needed - in Hetzner Cloud very, very quickly. It's perhaps the easiest and fastest way to deploy Kubernetes to Hetzner Cloud, so I would suggest you check this option too before proceeding with alternatives proposed on this blog. You can find more info here.)
This is the second part in the a two-part series on Kubernetes in Hetzner Cloud (referral link, we both receive credits). In the first part, I explained how to deploy Kubernetes in Hetzner Cloud with Rancher with the custom nodes setup. In this second part, I'll explain another method which uses an unofficial node driver for Rancher that lets Rancher create and manage servers in Hetzner Cloud directly without manual steps from us. I recommend you read the first part before continuing for added context.
Like I mentioned in the previous post, the downside of using the node driver instead of the "custom nodes" setup is that both Rancher and all the downstream Kubernetes clusters need to be in the same Hetzner Cloud project because they must be able to share the same private network.
At first I didn't like this because it's nice to be able to organize resources into different projects, but I must admit that I like more the node driver approach because it makes for a setup that is very similar to that of managed Kubernetes services. For example, you can scale and replace nodes with just a few clicks.
Requirements before we continue:
- you need to have a Hetzner Cloud account
- you need to be familiar with Kubernetes already
- you have set up a Rancher installation. Please refer to the previous post about doing this since it's the same process.
Installing the node driver
Assuming you have Rancher up and running already, the first thing we need to do before we can create downstream clusters using the node driver, is to install the node driver itself. Head to the "Global" view in Rancher, and click on "Tools" > "Drivers" > "Node Drivers" > "Add Node Driver".

You need to enter
- https://github.com/JonasProgrammer/docker-machine-driver-hetzner/releases/download/3.0.0/docker-machine-driver-hetzner_3.0.0_linux_amd64.tar.gz as the "Download URL"
- https://storage.googleapis.com/hcloud-rancher-v2-ui-driver/component.js as the "Custom UI URL"
- storage.googleapis.com in the "Whitelisted Domains"
Save and within a few seconds Rancher will report that the node driver is installed.
Creating the node template
Next, we need to create a node template so that Rancher knows which kind of servers to create. Before we do that, go to the Hetzner Cloud console and in the Rancher project you created as per the previous post create a read/write API token (remember, the downstream clusters created with the node driver must be in the same project as Rancher so that they can share the private network).
Back to Rancher, click on your avatar in the top right corner, then on "Node Templates" > "Add Template".
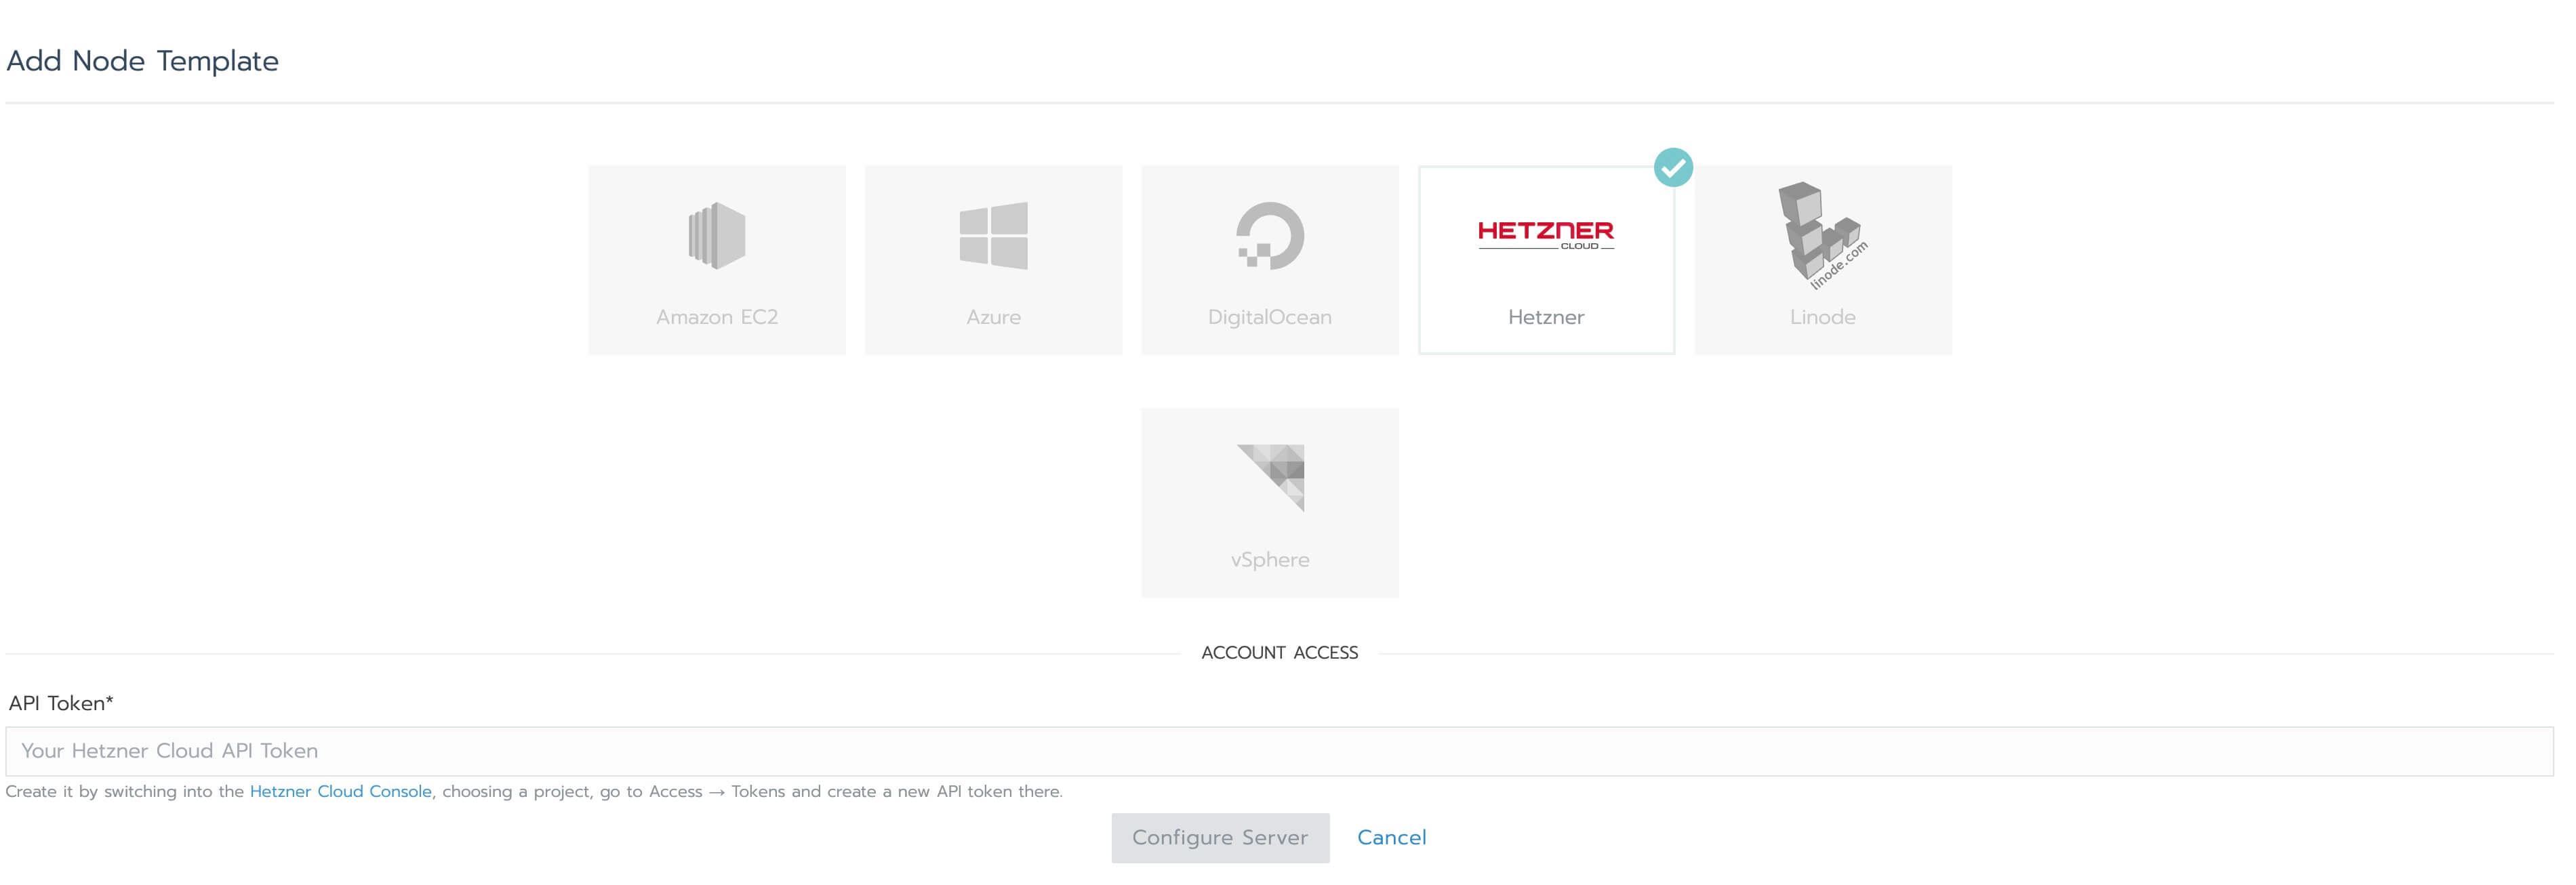
Select "Hetzner" and enter the API token, the click on "Configure Server":
- Region: preferably the same region as the region where you created the Rancher server, for minimal latency;
- Image: Ubuntu 20.04;
- Size: I recommend CPX31 since it's a good balance between performance and cost;
- For "Cloud Init Configuration" enter the following:
#cloud-config
packages:
  - ufw
  - fail2ban
package_update: true
package_upgrade: true
runcmd:
  - sed -i 's/[#]*PermitRootLogin yes/PermitRootLogin prohibit-password/g' /etc/ssh/sshd_config
  - sed -i 's/[#]*PasswordAuthentication yes/PasswordAuthentication no/g' /etc/ssh/sshd_config
  - systemctl restart sshd
  - ufw allow proto tcp from any to any port 22
  - ufw allow from <your IP address>
  - ufw allow from 10.43.0.0/16
  - ufw allow from 10.42.0.0/16
  - ufw allow from 10.0.0.0/16
  - ufw allow from 10.244.0.0/16
  - ufw -f default deny incoming
  - ufw -f default allow outgoing
  - ufw -f enable
The commands in this configuration will be executed automatically for each server created by Rancher, and do the following:
- disable password auth for SSH
- allow traffic for the SSH port (you don't need to open 80 and 443 if you are going to use load balancers for the ingress controller and other services)
- allow traffic between the nodes and Kubernetes components in general
- allow access from your IP address
- deny incoming traffic by default unless explicitly allowed by the "allow" rules
- allow all outgoing traffic
- enable the firewall
- install fail2ban so that IPs that generate many brute force attempts against SSH are banned for some time.
On the same screen, select the private network that already exists in the project and make sure you check "Use private network". Finally give the node template a name. My convention is <provider>_<region>_<server type>_<cores><memory>_<OS>, so with the above settings in my case the name would be "Hetzner_Nuremberg_CPX31_4c8g_Ubuntu2004".
Click on "Create" to confirm.
Creating a cluster using the node driver
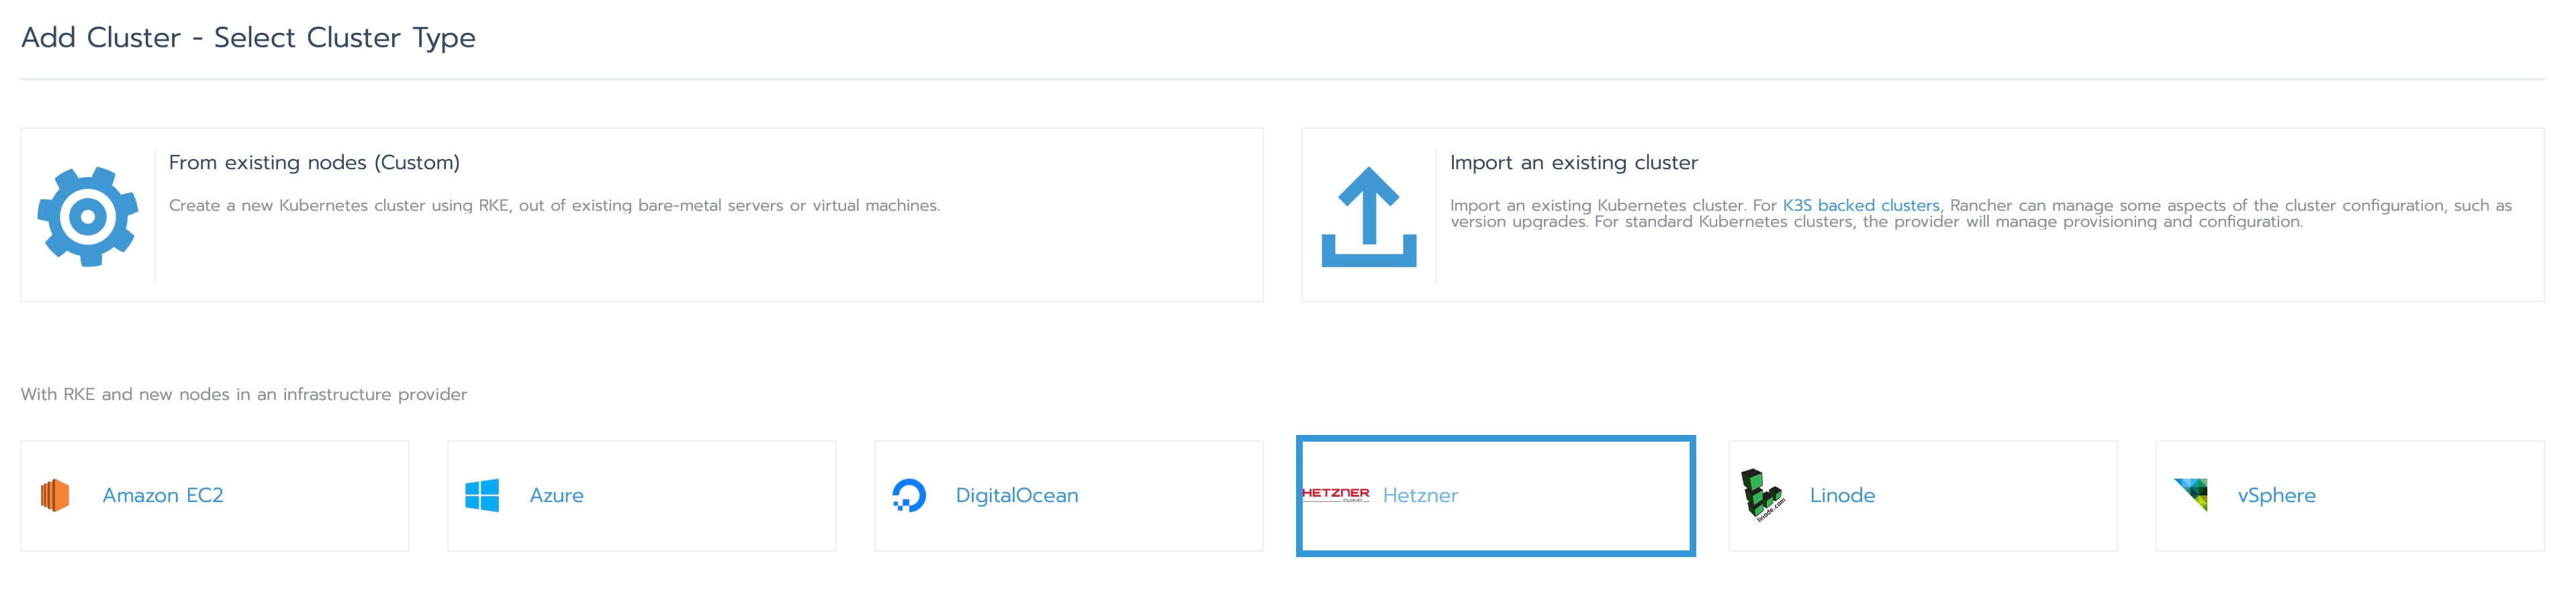
To create a cluster with the node driver, go to "Global" > "Clusters" in Rancher and click on "Add Cluster". Select "Hetzner" as the provider:
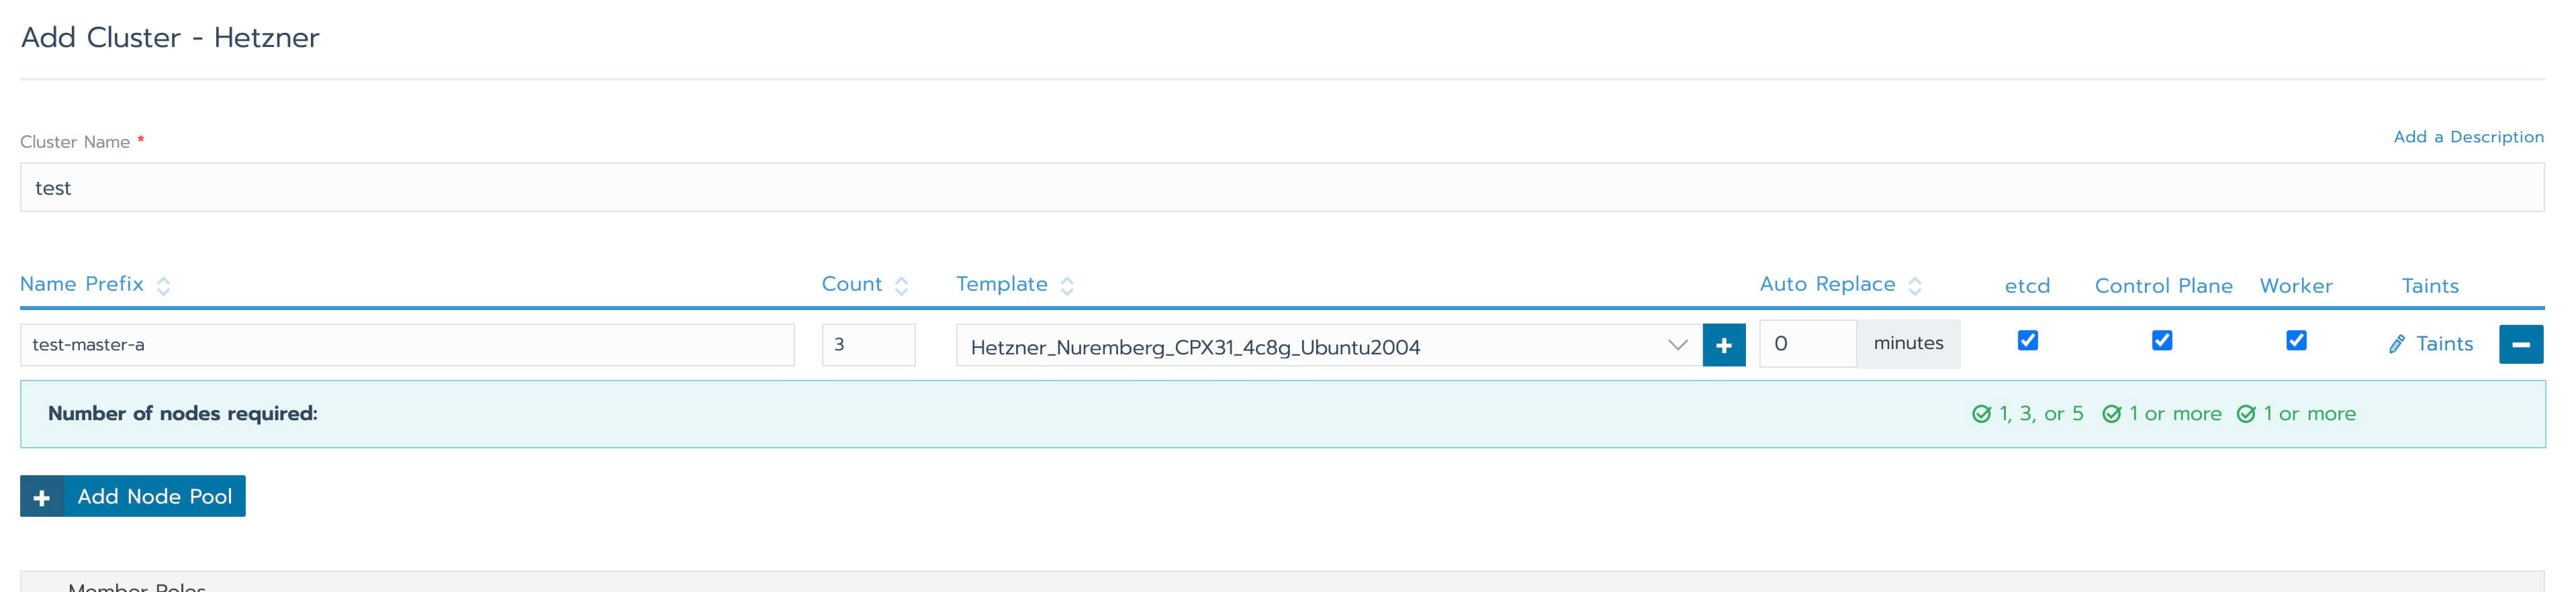
Give the cluster and the pool a name. For the clusters I use the letters of the Greek alphabet, and for the node pools I use the convention <cluster name>-<role>-<an incrementing letter>. This way for a cluster named "test" I would have a first node pool called "test-master-a" if all the roles are selected for the nodes of the pool. Specify how many nodes you want for the pool - 3 for a basic HA setup, then select the node template we created earlier and the roles (all for a small cluster). If you want some more production-like setup you may want to create multiple node pools for etcd, controlplane and workers.
Next, click on "Advanced options" and disable Nginx ingress because you are likely going to install the ingress controller separately with a load balancer. Then click on "Edit As YAML" and make the following changes:
1. add the following under "services":
kubelet:
  extra_args:
    cloud-provider: "external"
kube-controller:
  cluster_cidr: 10.244.0.0/16
2. specify the private network interface for the CNI so that all the traffic between the nodes goes through the private network:
network:
  plugin: "canal"
  canal_network_provider:
    iface: "enp7s0"
If you have chosen CPX31 as the server type in the node template the network interface should be enp7s0.
The last bit you need to add to the YAML config is the hostname you are going to use to access the API server in HA mode using a load balancer.
authentication:
  sans:
    - <hostname>
Be careful with the indentation when you edit the YAML config. Finally click on "Create".
You will see that Rancher now creates the servers in Hetzner Cloud automatically and deploys Kubernetes to them. The process should take around 6-8 minutes. Once the cluster is ready, the list of nodes under "Nodes" will look like this:

The nodes will be temporarily unschedulable for normal workloads because we need to install the cloud controller. But before we do that, we need to configure kubectl access to the cluster.
Click on "Cluster" > "Kubeconfig File" and copy somewhere the "certificate-authority-data" section from on of the contexts.
Next, go to Hetzner's cloud console and add a label named "cluster" to each of the nodes of the cluster with the name of the cluster as the value, such as "test". You can do this by clicking on the three dots menu for each server and clicking on "Labels".
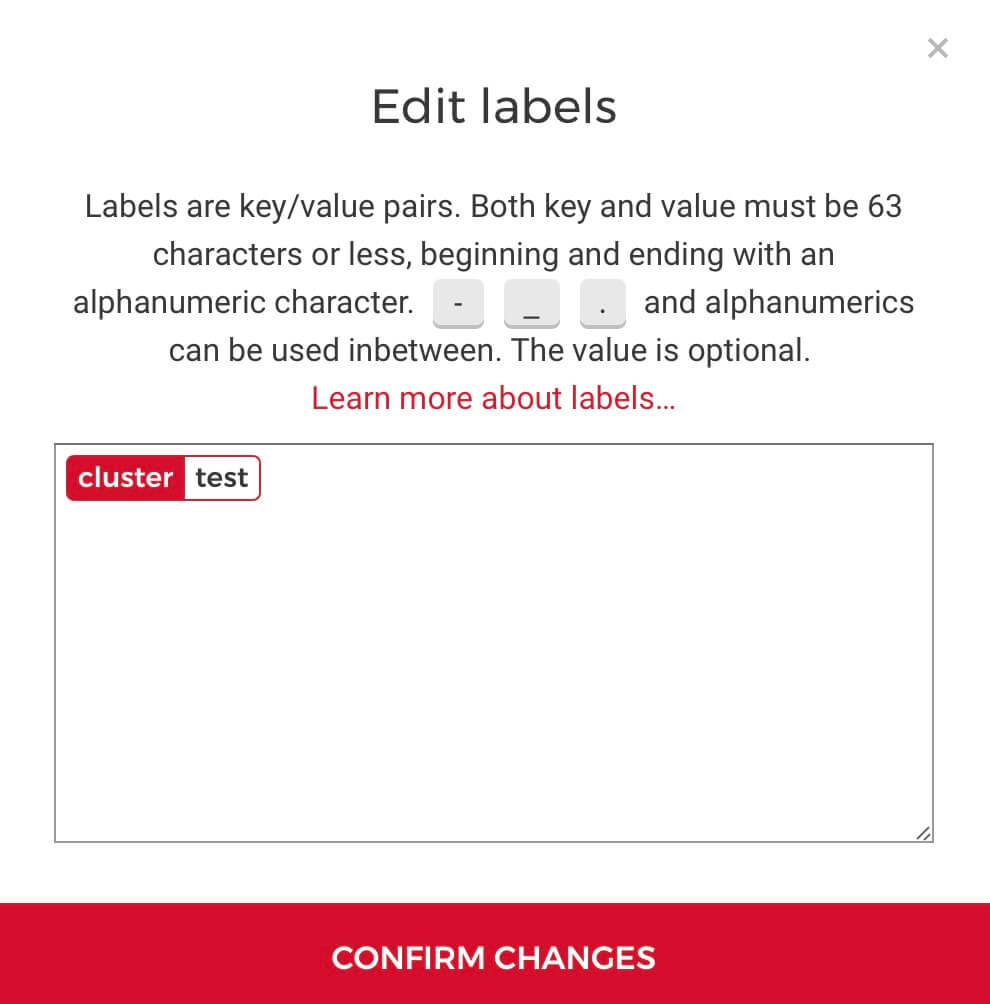
Make sure you do this for all the nodes of the cluster only - not the Rancher node or other nodes you might have in the project.
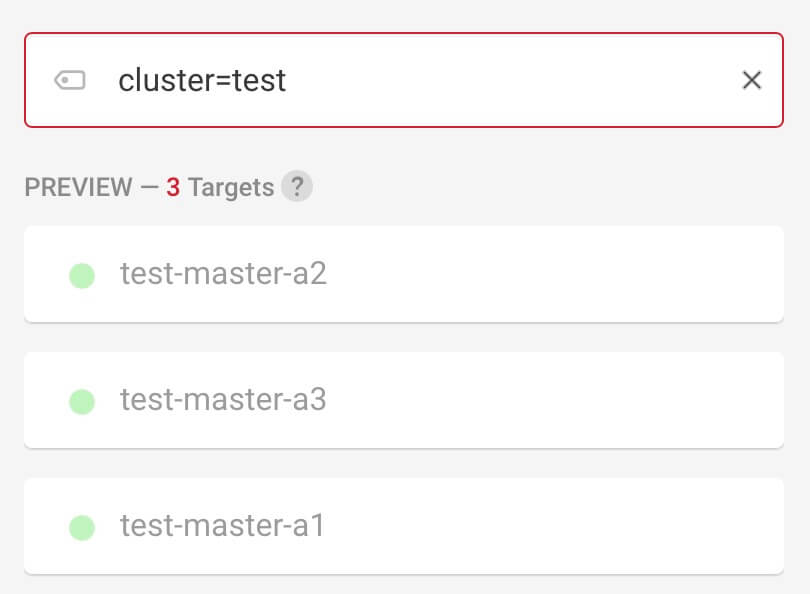
Next, we need to create a load balancer for the Kubernetes API. Go to "Load Balancers" > "Create Load Balancer", select the same region as the servers and the private network, then click on "Targets" > "Label". In the right panel enter "cluster=<name of cluster>" and ensure that only the expected servers are listed - if not, fix the label on the nodes. Click on "Private" so that the load balancer communicates with the nodes via private network, and then click "Add Label Selection".
Configure the only service you need:
- Protocol: tcp
- Source port: 443
- Destination port: 6443
Give a name to the load balancer (I use the convention "<cluster name>-api-server") and click on "Create & Buy now".
The load balancer will be ready in minute or so and should be healthy with three targets when ready. In the meantime, go to the DNS settings for the domain you want to use with this load balancer for the API server and create a record with the correct hostname pointing to the IP of the load balancer.
Once the load balancer is ready, go to Rancher and edit the cluster (main page of the cluster, click on the three dots at the top right and then "Edit"). Scroll to the bottom to the "Authorized Endpoint" section. In the "FQDN" field enter the hostname you are going to use with the API server and click "Save". Give Rancher a minute to update the cluster, then click on "Kubeconfig File" and download the file. Remember the "certificate-authority-data" we copied from the original kubeconfig file? Paste it in the file, inside the "<cluster name>-fqdn" context so that it looks like the following:
- name: "test-fqdn"
  cluster:
    server: "https://test-api-server.domain.com"
    certificate-authority-data: "LS0tLS1CR....
Also set the "current-context" to "<cluster name>-fqdn" so to use the load balancer to communicate with the API server. I should mention that you could skip the load balancer for the API server altogether, and just use the context named after the cluster (without the "-fqdn" suffix), but that means that you would connect to the cluster through the Rancher instance as a proxy, so if something happens to that you would be unable to connect to the cluster. Also, direct connections to the cluster are faster.
Now to use connect to the cluster with the new kubeconfig, run:
export KUBECONFIG=<location of the kubeconfig file>Then run `kubectl get nodes` to ensure you can connect to the cluster without errors. You now have HA access to the cluster.
Cloud controller manager and CSI driver
Now that we have access to the cluster, we need to install the Hetzner cloud controller manager so that we can use load balancers and run workloads on the nodes:
kubectl -n kube-system create secret generic hcloud --from-literal=token=<the Hetzner project token you created earlier> --from-literal=network=default

kubectl apply -f  https://raw.githubusercontent.com/hetznercloud/hcloud-cloud-controller-manager/master/deploy/ccm-networks.yaml
Similarly, to install the CSI driver (so that we can create persistent volumes), run:
kubectl -n kube-system create secret generic hcloud-csi --from-literal=token=<the Hetzner project token you created earlier>

kubectl apply -f https://raw.githubusercontent.com/hetznercloud/csi-driver/v1.5.1/deploy/kubernetes/hcloud-csi.yml
Conclusion
This concludes this two-part series on deploying Kubernetes to Hetzner Cloud with Rancher. We have seen two different ways to accomplish this, but at the moment I recommend the method with the node driver explained in this second part because it makes scaling and node pool management easier with just a few clicks in the UI, like with a managed Kubernetes service. I also tried to make this work with separate Hetzner Cloud projects but it was complicated and not really worth it. It's not a big deal really if Rancher and the downstream clusters are all in the same project, considering the benefits. I hope you find these two guides useful if you give Rancher and Hetzner Cloud a shot. With them you can achieve a great Kubernetes setup for very cheap. Let me know in the comments if you run into any issues.
 I am passionate about WebDev, DevOps and CyberSecurity. I am based in Espoo, Finland, where I work with the backend team at