Secure Kubernetes on Hetzner Cloud with a node driver for Rancher
 Published
(Update Aug 9, 2021: I have built a tool that can deploy a Kubernetes cluster - also highly available if needed - in Hetzner Cloud very, very quickly. It's perhaps the easiest and fastest way to deploy Kubernetes to Hetzner Cloud, so I would suggest you check this option too before proceeding with alternatives proposed on this blog. You can find more info here.)
Update: please ignore this post 🙂 I wrote a new, updated guide here. It's a much better way of using the node driver that now allows using a private network. It's also a lot simpler. Check that guide instead of this one if you are looking to deploy Kubernetes to Hetzner Cloud with Rancher.
Update: after writing this post (which I recommend reading anyway), I came up with a much, much simpler way of solving the same problem! I wrote a simple script that will keep the firewall updated whenever nodes are added/removed, automatically. All you need to do is just use the following cloud init yaml in your node template! (there’s a field for that in the node template edit screen)
#cloud-config
locale: en_GB.UTF-8

runcmd:
  - curl -s https://raw.githubusercontent.com/vitobotta/hetzner-cloud-init/master/setup.sh | bash -s -- --hcloud-token <token> --whitelisted-ips <whitelist> (--floating-ips)
You just need to specify the token for the Hetzner Cloud API, and a comma separated list of IPs you want to whitelist (at least Rancher and any other IPs from which you need to connect to the cluster). The --floating-ips flag is optional and is useful if you want each node to automatically configure any floating IPs in the Hetzner Cloud project.
That’s it! See the simple script in the repo.
Back in October, I wrote a post on how to deploy Kubernetes to Hetzner Cloud using Rancher, Terraform and Ansible. That setup works great, but requires that you maintain code for both Terraform and Ansible. Rancher can deploy its own distribution of Kubernetes (RKE) either to “custom nodes”, where you already have some servers with Docker installed and just run a Docker command to add them to a cluster, or with node drivers for cloud providers. With a node driver, Rancher can take care of creating the servers using Docker Machine as well as deploying Kubernetes, and this is particularly handy because you can just click a “+” button in the UI to scale (like you would do with a managed Kubernetes service), and because it makes replacing nodes easier every now and then so to always have servers with an updated OS. Rancher doesn’t have a node driver for Hetzner Cloud (referral link, we both receive credits) built in, but luckily one exists and is maintained by a third party.
The problem with the node driver for Hetzner Cloud
The node driver is very simple to use and works really well, with one serious caveat: when Rancher creates the servers in Hetzner Cloud and deploys Kubernetes, no firewall is set up, leaving the various Kubernetes services exposed, including etcd which is the database where things like secrets are stored. My understanding is that unauthenticated access to these services is forbidden, however I sleep better if I know that the relevant ports are closed for good with a firewall. The lack of a firewall is not a problem just with the node driver for Hetzner Cloud. Last time I checked, I had the same problem with the node driver for DigitalOcean (referral link, we both receive credits). This is the reason why so far I’ve been using the “custom nodes” setup instead, automated with Terraform and Ansible as described in the previous post. Yesterday I was looking into whether it would be possible to use the node driver, while still blocking access to the Kubernetes services. In order to achieve this, we could let Rancher create the servers and deploy Kubernetes first, and then configure a firewall (and perhaps Fail2ban as well) using a simple Ansible playbook. The problem with this is that you would need to configure SSH access to the servers (so that Ansible can connect to them) and download the SSH keys for the nodes from the Rancher UI (Rancher creates a different keypair for each server in Hetzner Cloud); this is slow and error prone if done manually, especially considering that it needs to be done each time you add/remove nodes; for Ansible, we would also need to update the inventory for the cluster each time, again manually. It turns out, we can actually automate these steps:
- to download the SSH keys we can use the Rancher API
- to let Ansible know which servers to connect to, we can use the hcloud plugin that implements a dynamic inventory for Hetzner Cloud
With a simple Ruby script, I was able to fetch the SSH keys, and then create a config file in ~/.ssh/config.d for each server so that Ansible can connect to it. But before going into more detail in to that, let’s first configure the node driver for Hetzner Cloud and create a test cluster with the default configuration so to prove that the ports of the Kubernetes services are exposed due to the lack of a firewall.
Setting up the node driver for Hetzner Cloud
To install the node driver, head to Tools > Drivers > Node Drivers from the “Global” in the Rancher UI (I’m assuming you already have Rancher, if not see this other post on how to set up Rancher in HA mode). Click on Add Node Driver and enter the information that you see in the README for the node driver. Once the node driver has been installed, click on your avatar in the navbar at the top of the Rancher UI and go to Node Templates. Node templates tell Rancher which type of servers to create and which operating system image to use.
Before creating a node template, you’ll need an API token for Hetzner Cloud, which the node driver will use in order to communicate with Hetzner Cloud to create the servers. So go to your Hetzner Cloud console, create a project and and under Access go to API Tokens, then click on Generate API Token. Give it a name and take note of the token - save it somewhere because it will only be displayed once.
Back to Rancher, click Add Template and you should be presented with a modal where you need to enter your API token for Hetzner Cloud:
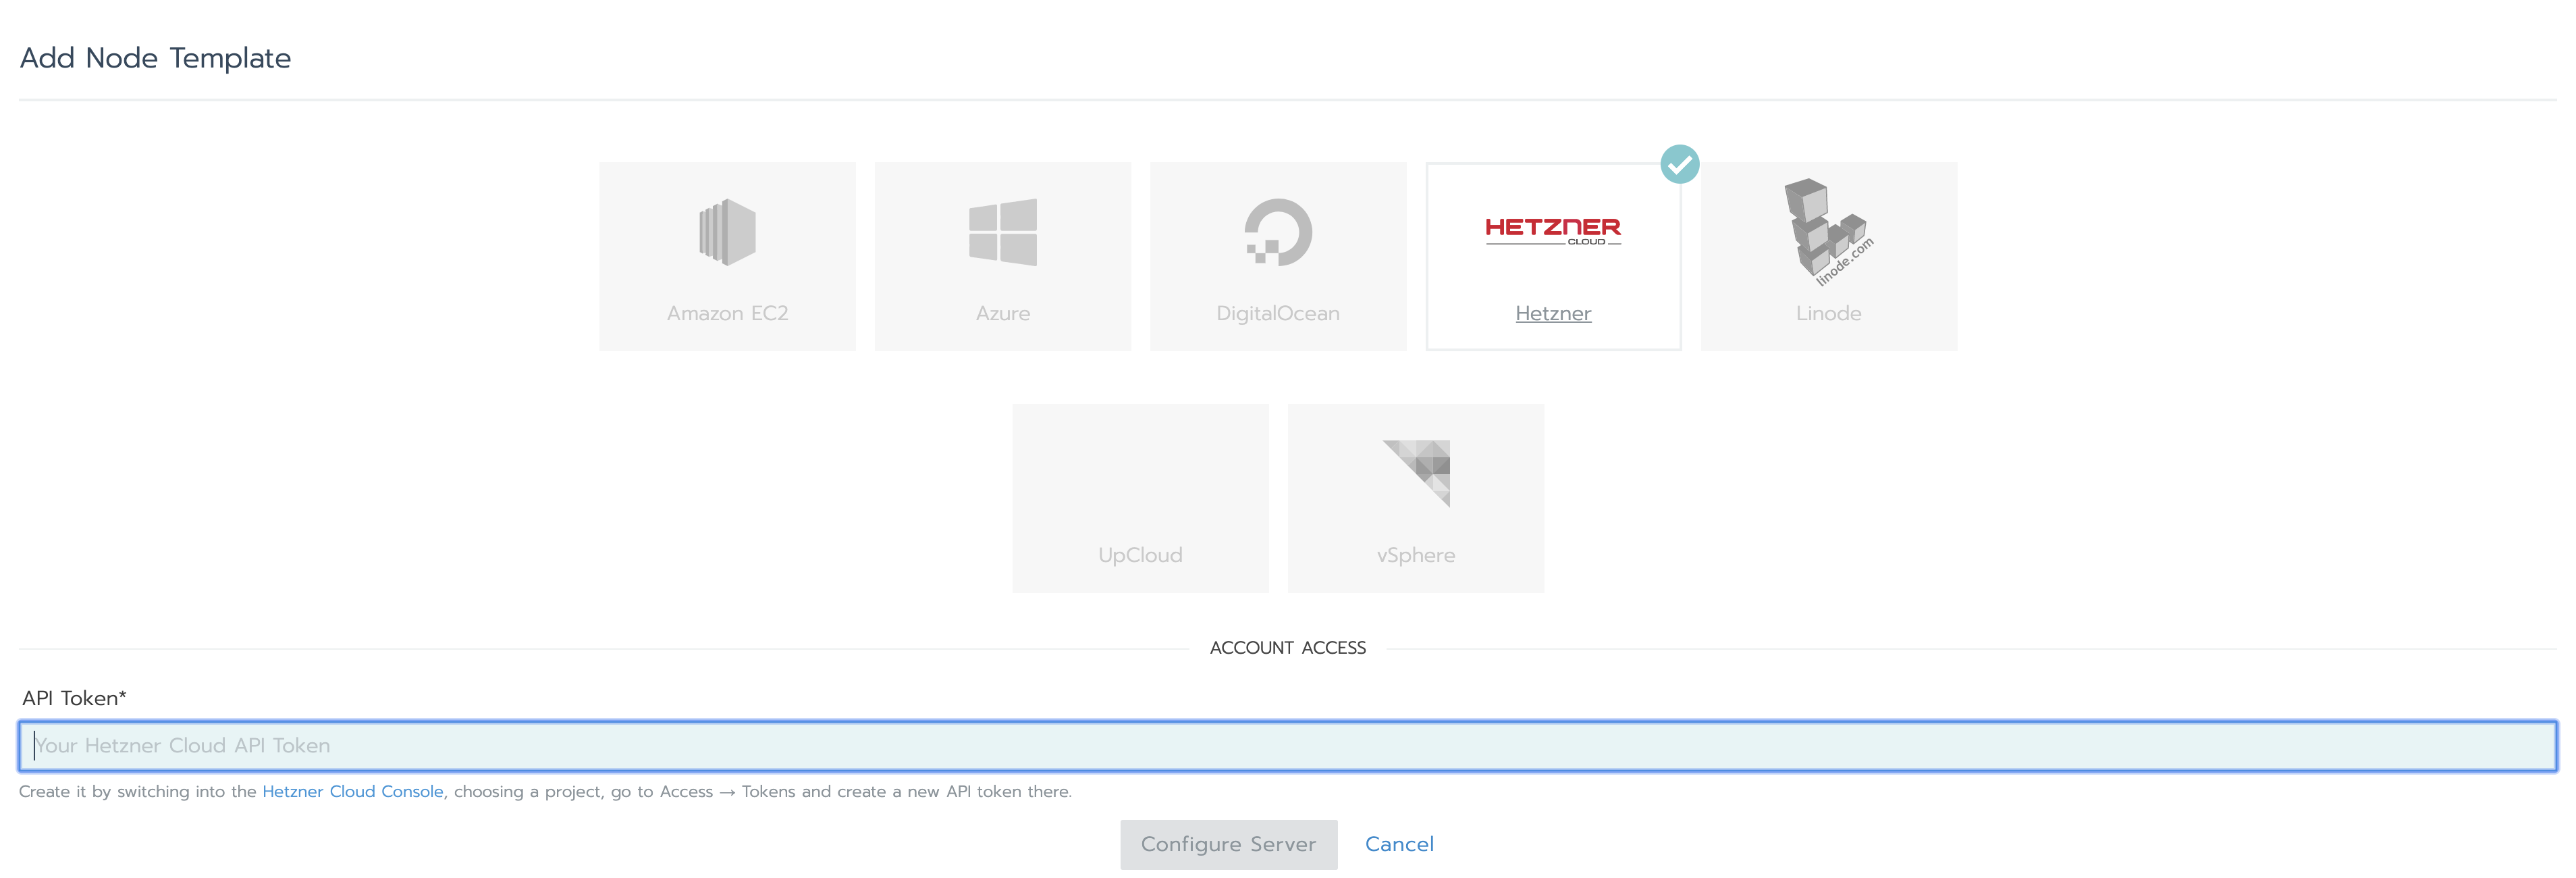
Enter the token, and you’ll see the screen below:
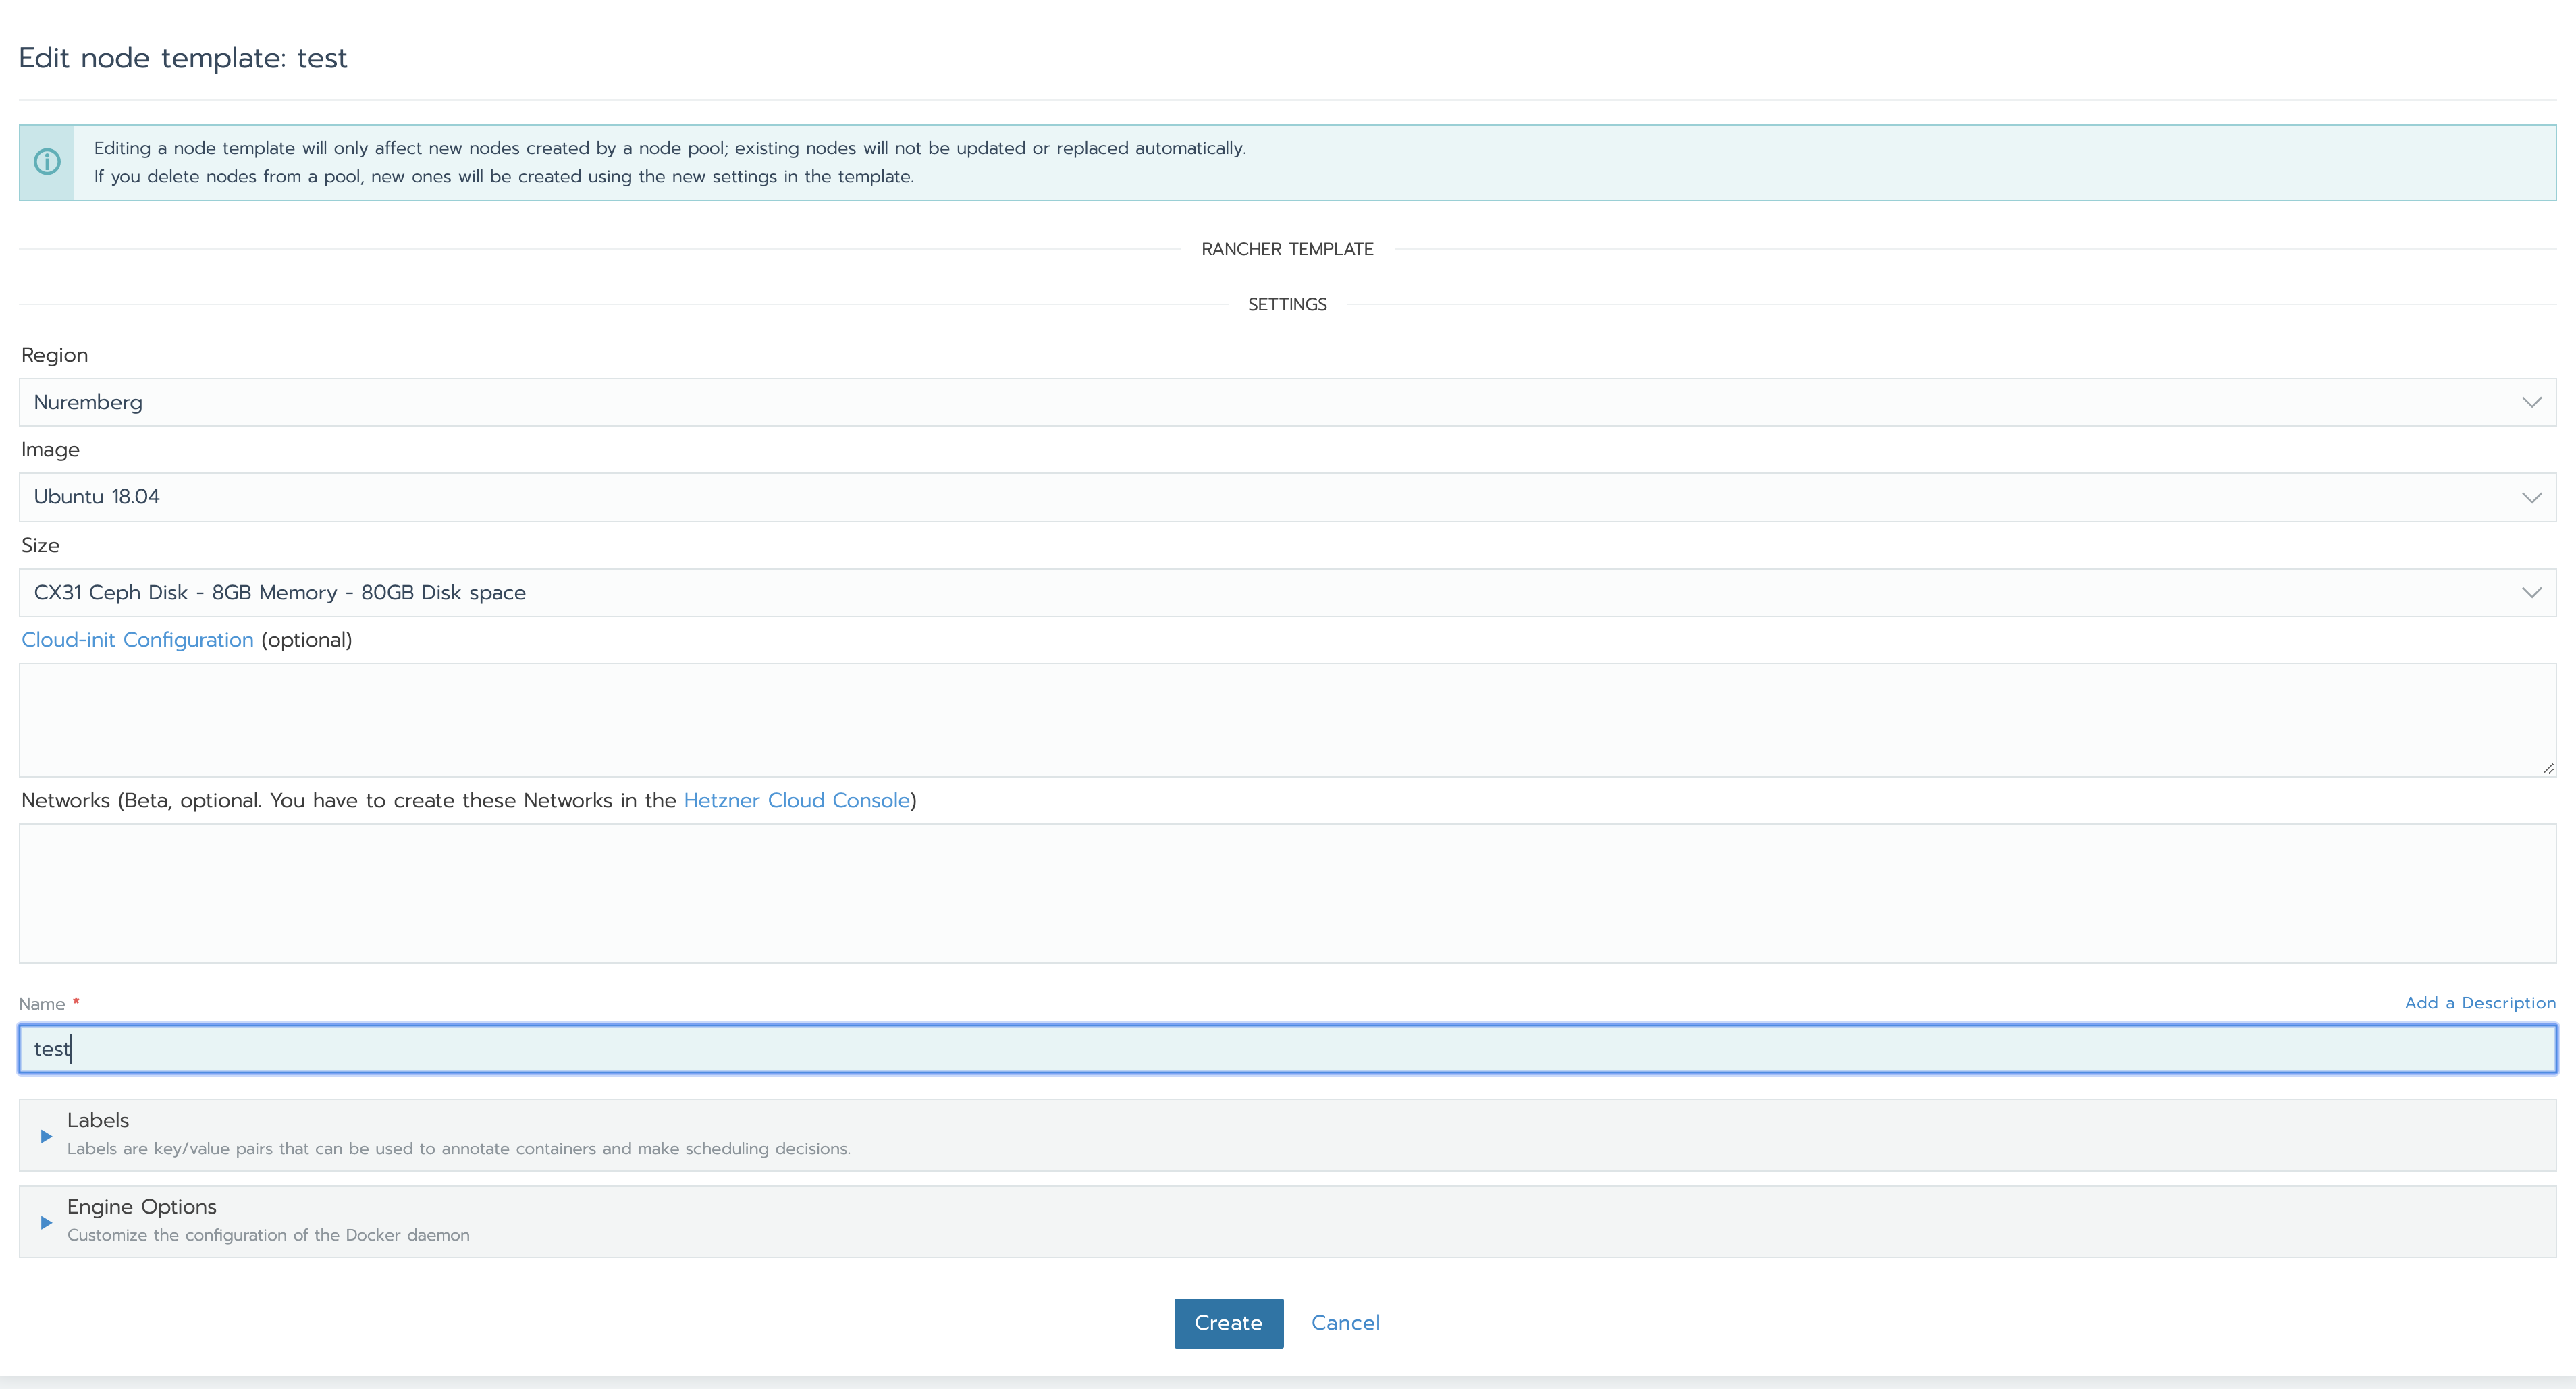
Chose the region (I recommend Nuremberg since it has good latency for US users as well), the OS image (choose Ubuntu 18.04 because the small Ansible playbook that we’ll see later to configure the firewall expects ufw as firewall; the OS is really not important for Kubernetes nodes). For the server type/size, I recommend instances with Ceph storage: local NVMe disks are naturally faster, but from months of experience with Hetzner Cloud I find that instances with Ceph storage offer more “stable” performance somehow. Don’t bother with selecting a private network (if you have one in your Hetzner Cloud project): the node driver lets you select a private network but Kubernetes will use the public network anyway (as confirmed in some issues on the Github repo of the node driver). Because of this, when creating the cluster in Rancher we’ll select Weave as the network plugin so to enable encryption of the traffic between the nodes. Finally, give the node template a name and save. Now, when you choose this template for a node pool in the cluster, Rancher will create servers with the settings specified in the template. You can create multiple templates with different server sizes if you want, and create pools of different type e.g. by role.
Creating the cluster
Next, let’s create a test cluster using the node driver as is. Go to Clusters, and click Add Cluster. You will be presented with a selection of ways that Rancher can deploy Kubernetes. You should see an option for Hetzner Cloud; select it, give the cluster a name and configure a node pool as shown in (open the image in another tab to see a larger version):

For the name prefix, I recommend you use the format “--”. For the pool id I use an incrementing number starting from 000; this way each time I replace a pool (to have new nodes with updated OS) I just increment this id so I can tell the pools apart. For the role, I use “master” if the nodes will have all the roles, “worker” if the nodes will only have the worker role, and so on for different roles. For this node pool, I am going to create 3 nodes (“Count”). Choose the template we’ve just created, and select all the roles; for this test cluster we’ll have a single node pool with HA for control plane and etcd, while the nodes will also be workers at the same time. For a production cluster, you may want to have different pools for different roles. Finally, select Weave as Network Provider (to enable the encryption), and click Create. Rancher will now create the servers (named test-000-master1, test-000-master2 and test-000-master3 because of our naming scheme) in Hetzner Cloud automatically and deploy Kubernetes; the whole process takes 5-10 minutes usually. You can check the status of the provisioning of the nodes under Nodes once you select the cluster. Give it some time to complete. Once the provisioning is done, go to Cluster and click on Kubeconfig File. Copy the kubeconfig and save it to a file. You can then use this kubeconfig by running the following before any kubectl commands:
export KUBECONFIG=<path of the file>Let’s verify that we can access the nodes by selecting one of the contexts in the kubeconfig (I use a handy utility called kubectx for this), and run
kubectl get nodesBefore moving on, let’s also verify that the encryption with Weave is actually enabled:
for pod in `kubectl -n kube-system get po --selector name=weave-net -o custom-columns=":metadata.name"`; do kubectl -n kube-system logs $pod -c weave | grep "Communication between peers"; done

for pod in `kubectl -n kube-system get po --selector name=weave-net -o custom-columns=":metadata.name"`; do kubectl -n kube-system exec $pod -c weave  -- /home/weave/weave --local status | grep Encryption; done
Both commands should clearly show that encryption is enabled.
Testing the default setup with kube-hunter
Like I mentioned earlier, one big problem when using the node driver is that no firewall is set up. One handy tool to scan a cluster for vulnerabilities is kube hunter; the easiest way to check what an attacker could see of the cluster and if there are any known vulnerabilities is by running kube hunter as a Docker container on your computer. Go to https://kube-hunter.aquasec.com/, enter your email, accept the terms and conditions and click Get Started. You will be given a Docker run command. Run this command on your computer and you will be presented with a choice for the scanning method:
Choose one of the options below:
1. Remote scanning      (scans one or more specific IPs or DNS names)
2. Interface scanning   (scans subnets on all local network interfaces)
3. IP range scanning    (scans a given IP range)
Your choice:
Enter “1” to perform a remote scanning, then enter the IPs of the nodes of the cluster separated by commas, then confirm. Kube hunter should report that no known vulnerabilities were found, but it should also say that both etcd and kubelet are open services, which is exactly what we want to avoid for greater security, regardless of whether unauthenticated access to these services is forbidden. Next, let’s fix that!
A simple Ansible playbook to configure the firewall
What we want to do next is write a simple Ansible playbook that configures ufw (since we are using Ubuntu as the OS) to allow any traffic between the nodes and Kubernetes services, allow full access to our own IP (so that we can connect to the cluster and run kubectl commands), and otherwise deny any incoming traffic, so to lock down the Kubernetes services. Create a directory somewhere called “ansible” or something like that, and then create the subdirectory ansible/roles/ufw/tasks. In it create the file main.yml with the following content:
---
- set_fact:
    ips: "{{ groups['all'] | map('extract', hostvars, ['ansible_default_ipv4', 'address']) | list }}"

- name: Install ufw
  package:
    name: ["ufw"]
    state: present

- name: Reset firewall
  ufw:
    state: reset
    policy: allow

- name: Enable intranode traffic on public network
  ufw:
    rule: allow
    src: "{{ item }}"
  with_items: "{{ ips }}"
  notify:
    - Restart ufw

- name: Enable Kubernetes traffic
  ufw:
    rule: allow
    src: "{{ item }}"
  with_items:
    - 10.43.0.0/16
    - 10.42.0.0/16
  notify:
    - Restart ufw

- name: Enable firewall
  ufw:
    state: enabled
    policy: allow

- name: Configure ufw defaults
  ufw: direction={{ item.direction }} policy={{ item.policy }}
  with_items:
    - { direction: 'incoming', policy: 'deny' }
    - { direction: 'outgoing', policy: 'allow' }
  notify:
    - Restart ufw

- name: Configure ports
  ufw: rule={{ item.rule }} port={{ item.port }} proto={{ item.proto }}
  with_items:
    - { rule: 'allow', port: '22', proto: 'tcp' }
    - { rule: 'allow', port: '80', proto: 'tcp' }
    - { rule: 'allow', port: '443', proto: 'tcp' }
  notify:
    - Restart ufw
By using this YAML config, Ansible will ensure that ufw is installed on the nodes and instruct it to (in order):
- reset the firewall to its default, which means deleting all the rules and disabling the firewall; there is a reason for this: whenever we remove a node from the cluster, we’ll run this playbook again and reconfigure the firewall so that access from the IP of the node being removed is denied
- allow any traffic coming from the IPs of all the nodes in the cluster
- enable any traffic from the IP ranges used by Kubernetes
- enable the firewall
- ensure that incoming traffic is denied by default
- open the ports 22, 80 and 443 so that both SSH access and web apps work as expected
The reason why I enable the firewall before setting the default policies is that by doing it the other way around the default policy for incoming traffic is left set to “allow”, for some reason. Not sure if it’s a problem with the Ansible plugin for ufw or with ufw itself.
Of course we don’t want to configure the Ansible inventory manually, especially considering that the nodes will be replaced every now and then for upgrades. To avoid this we can use the built in plugin for Ansible that uses the Hetzner Cloud API to find the servers automatically. Create the file in ansible/inventories/test.hcloud.yml with the following content:
plugin: hcloudThis “dynamic inventory” won’t work out of the box however. It requires a recent version of Ansible and the hcloud module for python. First, let’s install the latest version of Ansible. Assuming you have python3 already installed, it’s as easy as running the following:
pip3 install ansibleThen clone the repo [email protected]:hetznercloud/hcloud-python.git and run pip3 install . in it. Next, create the file ansible/ansible.cfg with the following:
[inventory]
enable_plugins = hcloud
which enables the Hetzner Cloud plugin. Let’s check if Ansible can “see” which servers are in our Hetzner Cloud project:
export HCLOUD_TOKEN=...
ansible-inventory  -i inventories/test.hcloud.yml --graph
Of course use your token. The output of the inventory command should look like this:
@all:
  |--@hcloud:
  |  |--test-000-master1
  |  |--test-000-master2
  |  |--test-000-master3
  |--@ungrouped:
If you see the above, it means that Ansible can communicate with Hetzner Cloud correctly. Next, let’s write a simple playbook to use the ufw role. Create the file ansible/playbook.yml with the following:
---
- name: Node provisioning
  hosts: all
  remote_user: root
  become: yes
  become_method: sudo
  roles:
    - role: ufw
      tags: ufw
(NOTE: you may want to add other things like fail2ban here, it’s up to you. Since this post is getting already quite long I’m skipping it but you can find simple roles for fail2ban online).
At this point Ansible is set up but won’t be able to connect to the servers yet because we haven’t configured SSH access, which comes next.
Configuring SSH access to the nodes
I wanted to configure SSH access in an automated way, so I wrote a simple Ruby script that does this for me. The content of the script (named “rancher-download-ssh-keys.rb” for me) is this:
#!/usr/bin/env ruby

require "http"
require 'optparse'
require 'fileutils'
require "down"
require 'zip'

Zip.warn_invalid_date = false

options = {}

OptionParser.new do |opts|
  # banner and separator are the usage description showed with '--help' or '-h'
  opts.banner = "Usage: rancher-download-ssh-keys.rb [options] [files]"
  opts.separator "Reads number of bytes or lines in the files"
  opts.separator "Options:"
  # options (switch - true/false)
  opts.on("--rancher-api-url=URL", "Rancher API URL") do |value|
    options[:api_url] = value
  end
  opts.on("--rancher-api-token=TOKEN", "Rancher API Token") do |value|
    options[:api_token] = value
  end
  opts.on("--cluster-id=ID", "Rancher Cluster ID") do |value|
    options[:cluster_id] = value
  end
end.parse!

abort "Please specify the required arguments - see list with '-h'" if options[:api_url].nil? || options[:api_token].nil? || options[:cluster_id].nil?

user, pass = options[:api_token].split(":")

ssh_dir = "#{ENV['HOME']}/.ssh"
ssh_cluster_dir = "#{ssh_dir}/#{options[:cluster_id]}"
ssh_config_d_dir = "#{ssh_dir}/config.d"
ssh_known_hosts_file = "#{ssh_dir}/known_hosts"

FileUtils.rm_rf ssh_cluster_dir if File.directory?(ssh_cluster_dir)

FileUtils.mkdir_p ssh_dir
FileUtils.mkdir_p ssh_cluster_dir
FileUtils.mkdir_p ssh_config_d_dir

cluster_name = JSON.parse(HTTP.basic_auth(user: user, pass: pass).get("#{options[:api_url]}/v3/clusters", params: { "id": options[:cluster_id] }).to_s)["data"][0]["name"]

Dir["#{ssh_config_d_dir}/*"].each { |ssh_config_file| FileUtils.rm_rf ssh_config_file }


nodes = JSON.parse(HTTP.basic_auth(user: user, pass: pass).get("#{options[:api_url]}/v3/nodes", params: { "clusterId": options[:cluster_id] }).to_s)["data"]
nodes.each do |node|
  node_name = node["nodeName"]
  ip_address = node["ipAddress"]
  ssh_keys_archive_uri = URI.parse(node["links"]["nodeConfig"])
  download_url = "#{ssh_keys_archive_uri.scheme}://#{options[:api_token]}@#{ssh_keys_archive_uri.hostname}#{ssh_keys_archive_uri.path}"
  keys_path = "#{ssh_cluster_dir}/#{node_name}"
  archive_zip_path = "#{ssh_cluster_dir}/#{node_name}.zip"

  Down.download(download_url, destination: archive_zip_path)

  FileUtils.mkdir_p keys_path

  Zip::File.open(archive_zip_path) do |zip_file|
    zip_file.each do |f|
      f_path = File.join(ssh_cluster_dir, f.name)
      f.extract(f_path)
    end
  end

  FileUtils.rm_rf archive_zip_path

  File.chmod(0400, "#{keys_path}/id_rsa")

  ssh_known_hosts_file_lines = File.readlines(ssh_known_hosts_file)
  filtered_lines = ssh_known_hosts_file_lines.select{|line| !line.start_with?(ip_address) }

  File.open(ssh_known_hosts_file, 'w') do |f|
    filtered_lines.each do |line|
      f.write line
    end
  end

  ssh_config = <<EOS
Host #{node_name}
  HostName #{ip_address}
  User root
  IdentityFile #{keys_path}/id_rsa

Host #{ip_address}
  HostName #{ip_address}
  User root
  IdentityFile #{keys_path}/id_rsa

EOS

  File.open("#{ssh_config_d_dir}/#{node_name}", "w") { |f| f.write(ssh_config) }
end
This isn’t a post about Ruby, so I won’t be explaining the script line by line. Suffice it to say, the script connects to the Rancher API, then downloads the SSH keys for the nodes of our cluster, and creates a config file in ~/.ssh/config.d for each node so that we can connect to it with e.g. ssh test-000-master1 or using the IP address instead of the hostname (when Ansible fetches the list of the servers from Hetzner Cloud, it isn’t aware of the names of the servers; it seems like a limitation of the Hetzner Cloud plugin).
Before we can use the script, go to API & Keys in Rancher, create a new key and take note of the token. Also go to the page of the cluster and take note of the cluster ID from the URL (“c-g4vp6” in my case). Then we can run the script to configure SSH access to the nodes automatically:
rancher-download-ssh-keys.rb --rancher-api-url <URL of your Rancher instance> --rancher-api-token "<your Rancher API token>" --cluster-id <the ID of your cluster>
After running the script, test SSH access with one node, e.g. ssh test-000-master1.
Running the Ansible playbook
Now that we have SSH access to the nodes configured, we can finally run the Ansible playbook and configure the fierewall:
ansible-playbook -i inventories/test.hcloud.yml playbook.ymlTesting again with kube hunter
The firewall is now configured, so let’s run again the Docker command you got from the kube hunter website, choosing “remote scanning” and specifying the IPs of the nodes separated by commas. This time you should see this:
Kube Hunter couldn't find any clustersMuch better! Because everything is locked down for the outside world, a potential attacker couldn’t even figure out that there is a Kubernetes cluster running on our nodes.
Allowing full access to our IP
If you try to run any kubectl commands now, you will find that you can’t connect to the cluster, as expected. You’ll need to whitelist your IP to allow this, so edit the tasks.yml file and add:
- name: Whitelisted IPs
  ufw:
    rule: allow
    src: "<your IP>"
  notify:
    - Restart ufw
Then run the playbook once again. Note that if you run kube hunter now it will report again that the Kubernetes services are open. This is expected since we have allowed full access to our IP, but anyone connecting from other IPs wouldn’t be able to detect that there is a Kubernetes cluster, as shown earlier.
Conclusions
This became a longer post that I had anticipated, but I wanted to explain how I am using the Hetzner Cloud node driver for Rancher and why. The TL;DR is that you only need to create a simple Ruby script and a small Ansible playbook to configure the firewall (both of which I have provided). Then, whenever you create a cluster all you need to do is:
- Create the cluster in Rancher using the node template and selecting Weave and the network plugin
- Run the Rancher script to configure SSH access to the nodes
- Run the Ansible playbook to configure the firewall
This is IMO much simpler than having to maintain also some Terraform code. Similarly, whenever you add/remove nodes, all you need to do is:
- Temporarily disable the firewall on the nodes, because otherwise new nodes wouldn’t be able to communicate with the old ones:
ansible -i inventories/test.hcloud.yml all -a "ufw disable"- Make the changes to the cluster
- Run the Rancher script to update the SSH config
- Run the playbook again to configure the firewall on both the old and the new nodes
With this setup, like I mentioned earlier I can just click a “+” button to scale the nodes, and it’s also very easy to replace node pools with new ones to have updated OS etc. Rancher is amazing, I have learnt a lot about Kubernetes over the past few months but without Rancher it would have been much harder. Even as I learn more and more I still love using it for both deploying and managing Kubernetes. Hetzner Cloud offers a very good service at incredible prices compared to most of its competition. The combination of these two makes for a very affordable and enjoyable Kubernetes experience. As usual, let me know in the comments if you run into any problems with this setup.
 I am passionate about WebDev, DevOps and CyberSecurity. I am based in Espoo, Finland, where I work with the backend team at