Rails and Active Storage: permanent URLs with no redirects, using Digital Ocean behind Cloudflare
 Published
I have started to use Active Storage, and so far I like a lot how quick and easy it is to set it up and start attaching files to any model with just one line of code and no additional database migrations. Active Storage isn’t perfect though, and has some issues. One of these is the fact that - by default - the URL helpers for Active Storage attachments generate URLs that are expiring (default is 5 minutes) and are URLs to a route in the Rails app itself, which then redirect to the actual storage endpoint if S3 or some similar storage is used.
There are two downsides to this approach. First, the expiring URLs make it basically impossible to effectively use Active Storage with a CDN; second, the redirect implies that each request for an attachment has to go through the Rails app first, defeating part of the benefits of using an external storage and/or CDN in first place, because the app may have to handle a significant amount of additional requests.
Rails’ master branch now includes a change which will make it into the Rails 6.1 release, and that allows you to configure a storage service as “public”, meaning that URLs are no longer expiring. This helps with caching, but there is still the annoying redirect. If all you want is serve images directly from a CDN, avoiding that requests must first go through the Rails app, this isn’t optimal. Luckily there is an easy workaround, which I’ll show in this post.
I’m using Digital Ocean's Spaces (referral link, we both receive credits) for the actual storage since I am using DO’s managed Kubernetes and database services already to host my app; plus it’s cheap and S3-compatible. Spaces has a built in CDN, but that of course costs money. For this reason I’m also using Cloudflare for free bandwidth :)
Setting up Digital Ocean Spaces and Cloudflare
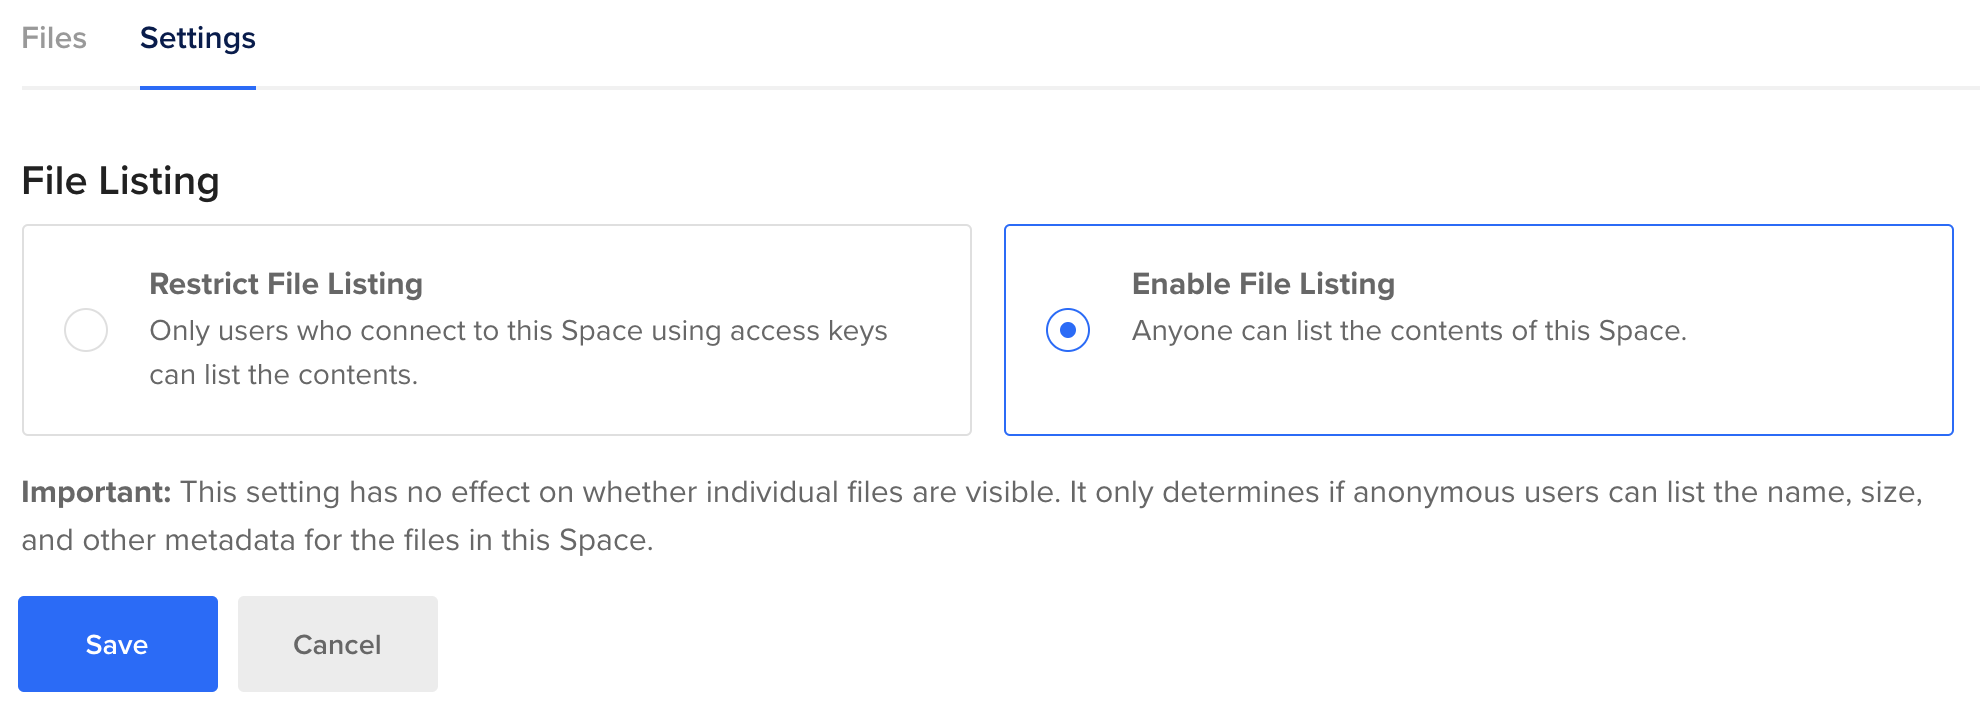
The first thing you need to do course is create a space in Digital Ocean. Then in the settings for the new space, you also need to enable file listing so that anyone can access the files publicly (which is fine if we are talking about images etc that your app will be showing to the public):
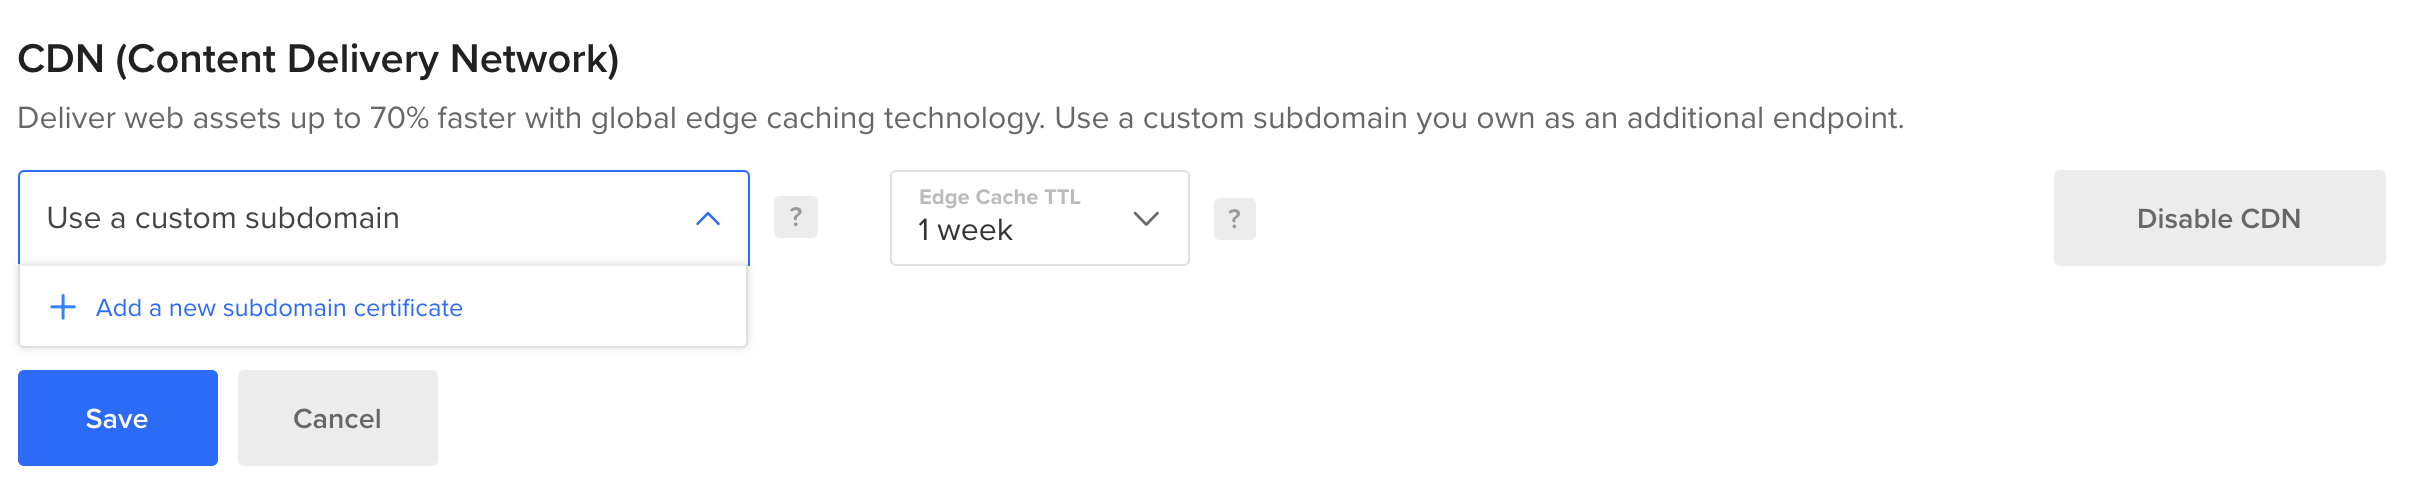
Then, in the CDN section click Enable and you will have the option to add a subdomain:
Click Add a bew subdomain certificate and then Bring your own certificate:
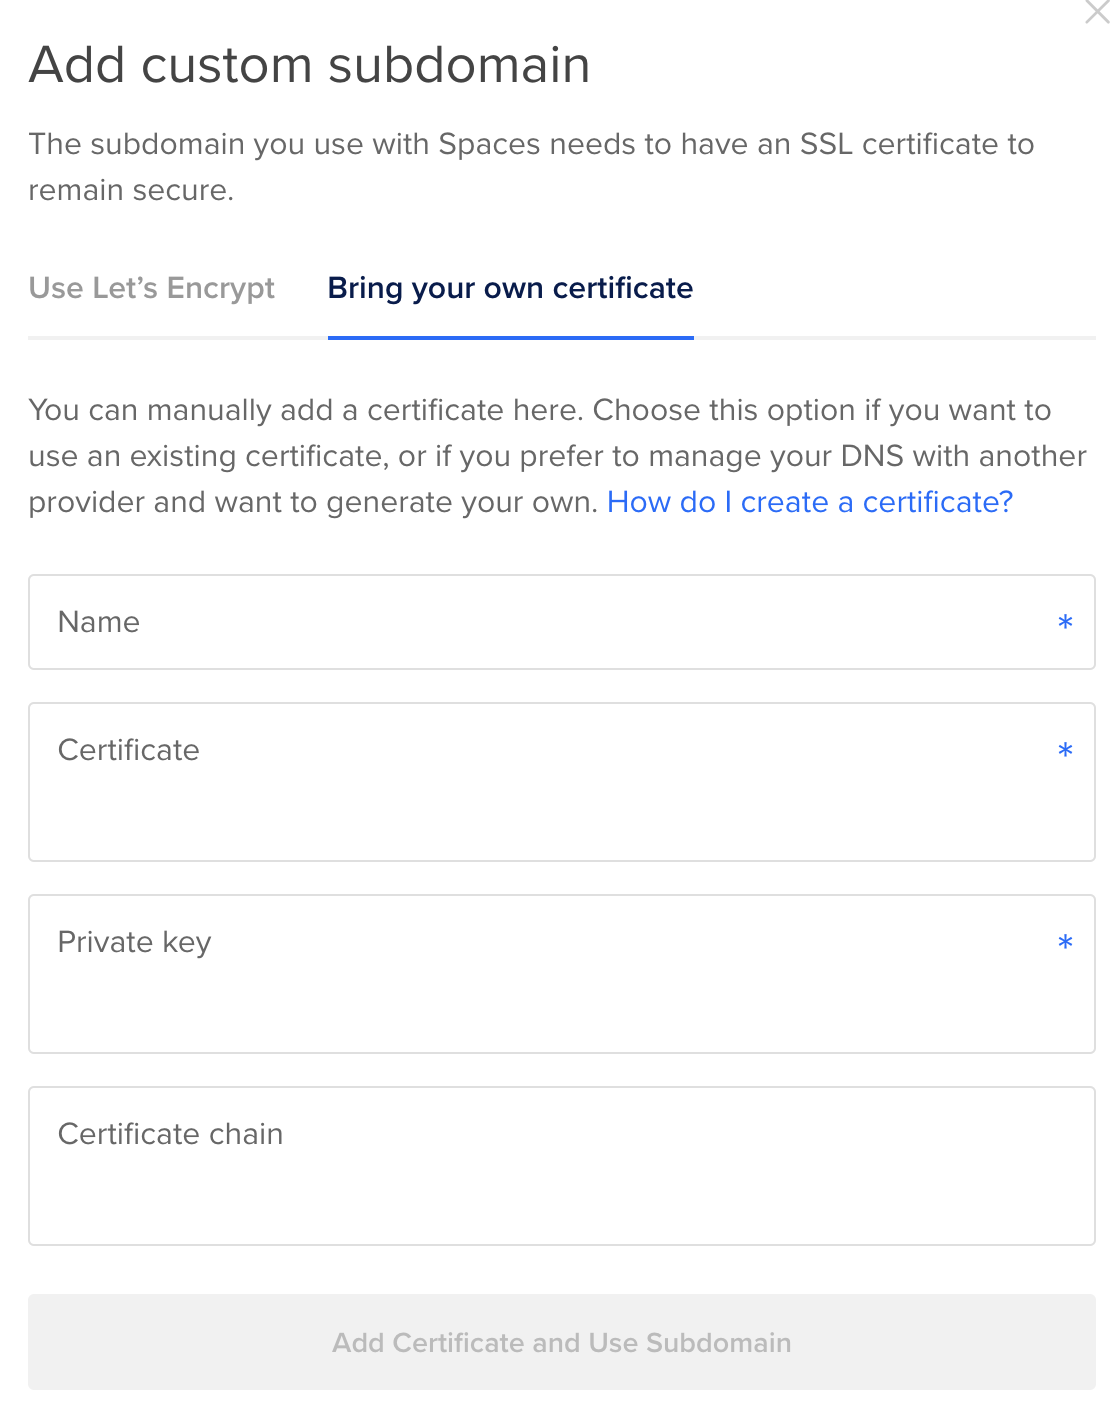
Here you only need to give the certificate a name, and paste the certificate and the private key you’ll get from Cloudflare - you can ignore the certificate chain. So keep this tab open, and in another tab go to SSL/TLS for your domain in the Cloudflare control panel, then Origin Server. Click Create certificate:
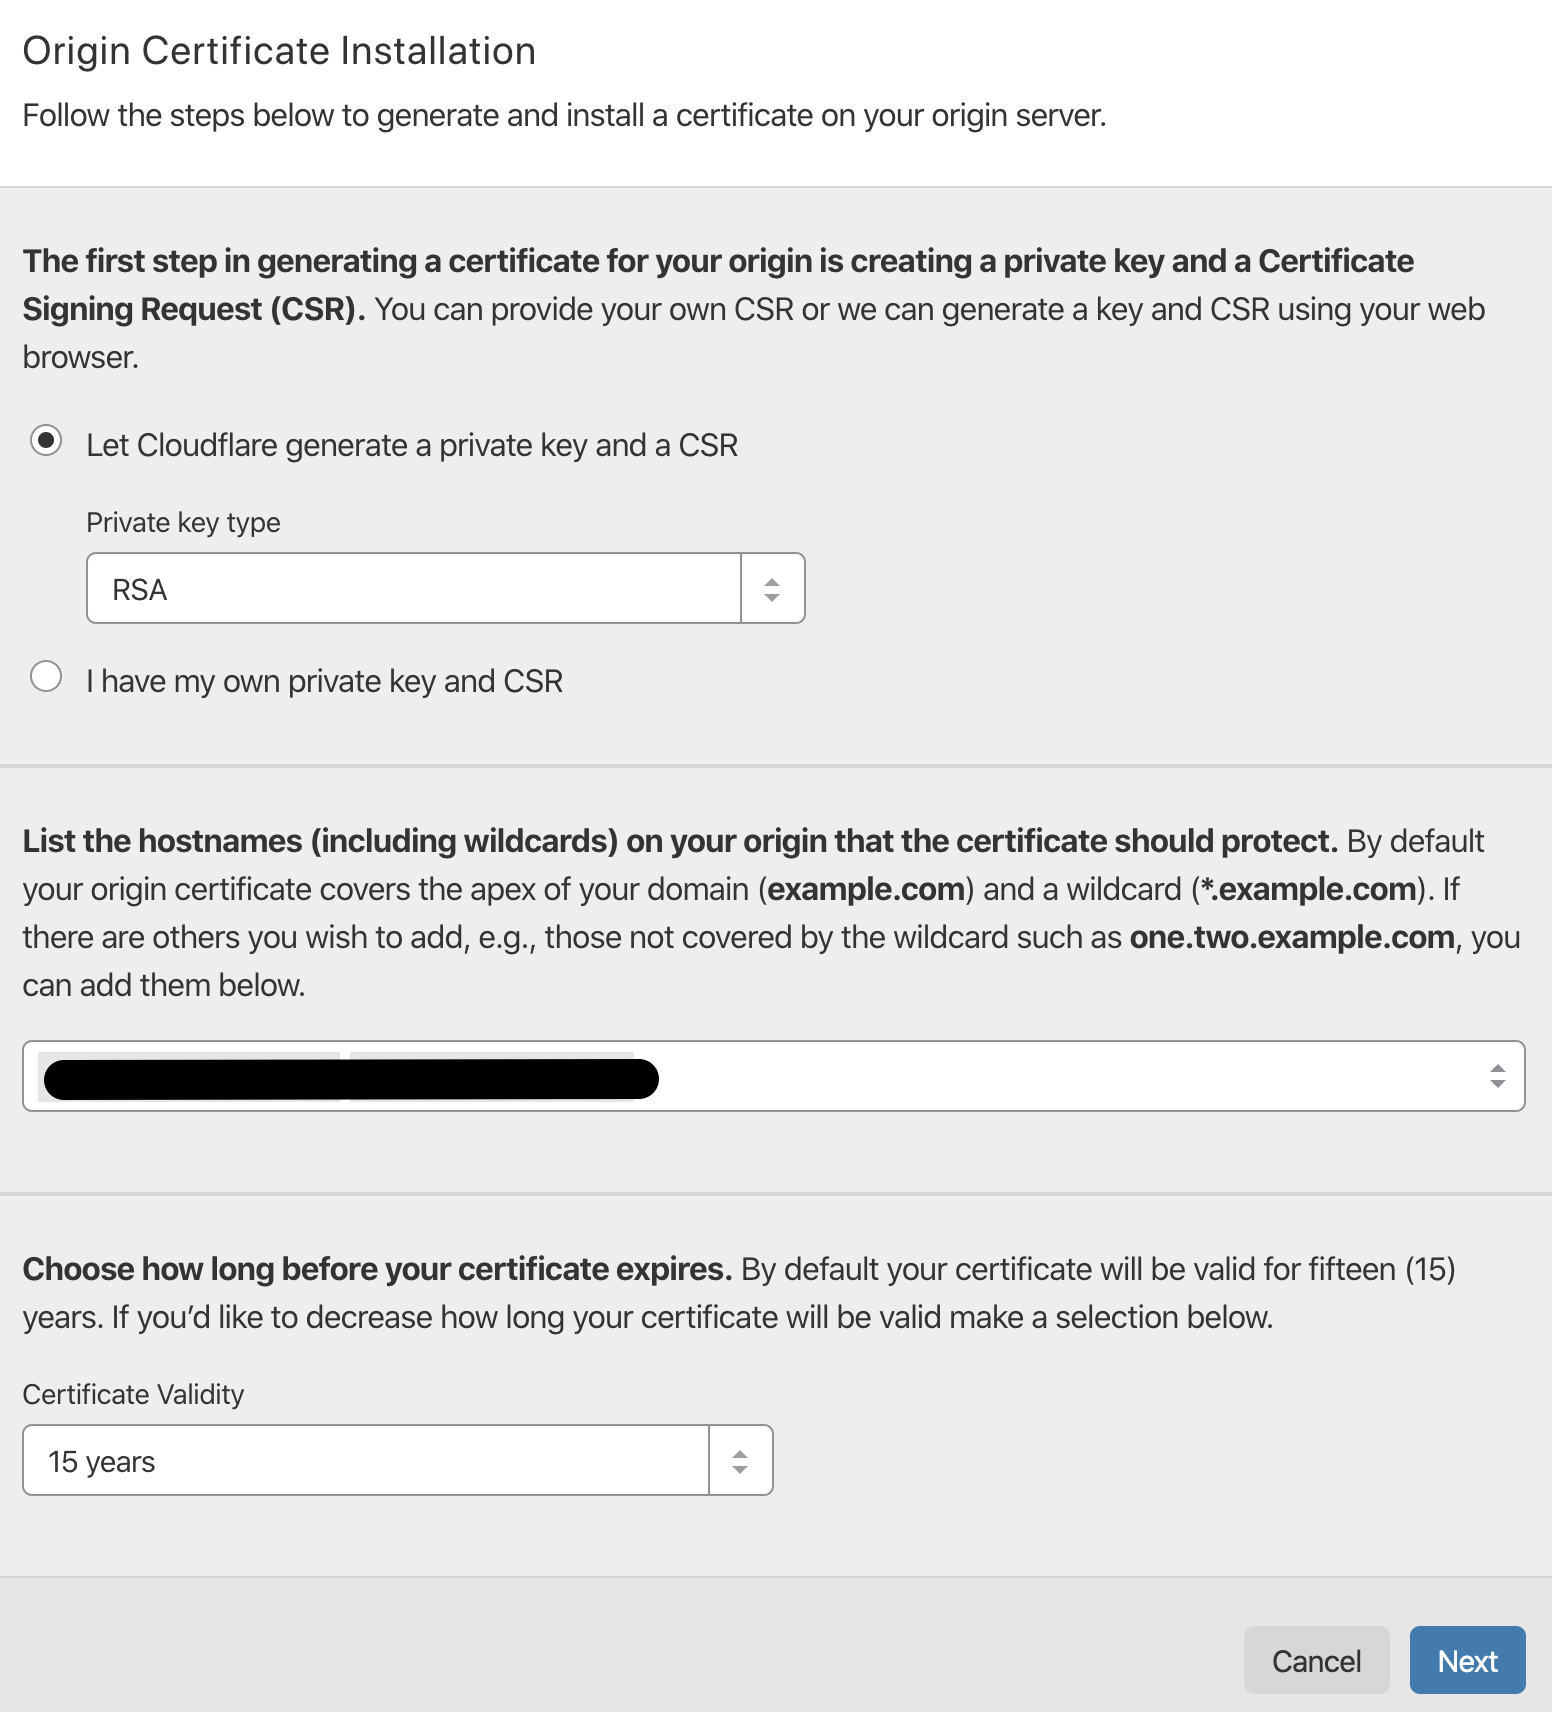
Make sure the subdomain you want to use with your space is covered by the certificate, and click Next. On the following screen you will see the certificate and the private key you’ll need to paste into Digital Ocean. So go back to the Digital Ocean tab, paste these and enter the subdomain for the domain (hosted on Cloudflare) that you want to use; in my example it’s cdn-test.mydomain.com. Before you click on Add Certificate and Use Subdomain, copy the endpoint hostname (in my case test-blog-post.fra1.cdn.digitaloceanspaces.com.) and use it to configure a CNAME record in Cloudflare for the subdomain:

Ensure the proxy status is Proxied (otherwise Cloudflare won’t be caching the assets and you’ll pay for DO bandwidth instead for each request) and save.
Back to Digital Ocean, click on Add Certificate and Use Subdomain first, and then Save to confirm.
Testing the CDN
The Digital Ocean/Cloudflare set up is complete. To test, go to Files in Digital Ocean, and upload an image. Make sure it’s set as Public or it won’t work. Now, if you hover on the filename a popup will show the default Spaces endpoint, the Spaces CDN endpoint, and our subdomain endpoint managed by Cloudflare. Copy this last URL and test it in the browser, you should see the image.
Configuring Active Storage to use Digital Ocean
gem 'rails', github: 'rails/rails'
then run bundle install.
Next, edit config/storage.yml (I’m assuming you already have ActiveStorage installed) and add the following section:
s3:
  service: CustomS3
  access_key_id: "<%= ENV.fetch("S3_ACCESS_KEY_ID", "") %>"
  secret_access_key: "<%= ENV.fetch("S3_SECRET_ACCESS_KEY", "") %>"
  region: "<%= ENV.fetch("S3_REGION", "") %>"
  bucket: "<%= ENV.fetch("S3_BUCKET", "") %>"
  endpoint: "<%= ENV.fetch("S3_ENDPOINT", "") %>"
  public: true
I’m using environment variables here but you can use Rails credentials or whatever you prefer. Notice that the name of the service is CustomS3. This is because we are going to need a custom service to tweak the public URLs for our attachments, so that the attachments are loaded directly from Cloudflare instead of having requests go through the Rails app first, and then be redirected to the CDN.
Next, edit lib/active_storage/service/custom_s3_service.rb and paste the following:
require "active_storage/service/s3_service"
require 'uri'

class ActiveStorage::Service::CustomS3Service < ActiveStorage::Service::S3Service
  private

    def public_url(key, **)
      url = object_for(key).public_url
      "https://#{ ENV['CDN_HOST'] }/#{URI(url).path}"
    end
end
With this little code we ensure the final URL has the Cloudflare subdomain as the hostname.
Lastly, you need to change sligtly how you link to attachments in your views. For example, instead of something like
<%= image_tag current.avatar.variant(resize: '50x50!') %>
you’ll need something like
<%= image_tag current.avatar.variant(resize: '50x50!').processed.service_url %>
processed ensures that the variant is uploaded to Digital Ocean the first time, and calling service_url explicitly ensures our custom public_url (including the CDN hostname) is used instead of the default redirecting URL.
That’s it! Now attachments will be loaded directly from Cloudflare without going through your Rails app first. This should save some money with bandwidth costs and make the load on your app servers much lighter. I didn’t mention direct uploads to Spaces before but that’s something you should look into as well, so that attachments are uploaded directly to Spaces, again without going through the Rails app first. Check the official guide for this. Hope this was useful, let me know in the comments if you run into any issues with this.
 I am passionate about WebDev, DevOps and CyberSecurity. I am based in Espoo, Finland, where I work with the backend team at