Reapply thermal paste on a Macbook Pro
 Published
Why would you want to reapply thermal paste on a MacBook Pro? A little story. My main machine these days is a mid-2010 15″ Macbook Pro powered by a dual core i5 (2.53GHz) CPU. I also have a better performing Hackintosh at home, but because of the portability I find myself using the MBP more. It’s a thing of beauty and I love it, as I have the previous Macs I’ve had the pleasure to work with both at home and at work. Since I purchased it, however, it has always been plagued with excessive heat issues: even 85C in idle or with very, very light load! If I said that I could perhaps fry an egg on its surface at times, I don’t think I would be too far from the truth. The laptop got really, really hot at times to the point that touching it for more than a couple of seconds was often more likely painful than just uncomfortable. The CPU is rated to work just fine at a temperature of up to 105C, so until recently I didn’t really care too much about the temperatures since, after all, the Mac seemed to work fairly OK and I didn’t have any other problems with it.
That was until I got really tired of the noisy fans (always running at the max speed of 6K RPM), and I started to wonder whether I should bring it in. I had already tried the usual stuff like resetting the SMC, or the PRAM/NVRAM, with poor results. Then I also noticed that with no doubt the excessive heat was affecting the performance of the laptop quite badly, much more so than I’d have thought possible considering that the temperatures were anyway always well within the 105C max, so from that point of view the CPU was still operating “safely”; lately, however, the laptop seemed to be performing like a much older machine… which was no good. For example, Handbrake video encoding tasks were ridiculously slower than I’d expect from this sort of machine, and then I also noticed that the kernel_task process was almost constantly at the top of my activity monitor with 200-300% CPU utilisation. What the.. ?
Some research on the web confirmed my suspicions that there was indeed a relation between the temperatures, always high but strangely never above 90-92C, and the general slowness, in particular with tasks such as video encoding or heavy testing. Apparently, this is due to the CPU throttling that kernel_task in Mac OS operates to prevent heat from damaging the hardware. I did some simple tests to confirm this, such as watching a Flash HD video for a while and then killing it: video would play fine in the beginning and then become a little sluggish as the CPU got hotter; at that point, kernel_task would be throttling the CPU and stay at the top with very high CPU utilisation and higher priority, so Flash would naturally be slowed down as a consequence and the temperature would never go above 92C or so; once I killed Flash, things would return to normal again and kernel_task would go back to a much lower CPU utilisation. This is – I think – the mechanism used by the software to manage CPU utilisation and heat.
From personal experience, I am aware that heat issues on laptops are often caused by a poor application of the stock thermal paste (also known as “thermal interface material” or TIM), provided that the cooling system is functioning. The reason is simple: the thermal paste – as the name suggests – is supposed to facilitate the transfer of the heat from the CPU/GPU to the heatsink. This only works efficiently, though, if a very thin layer of thermal paste is applied between CPU and heatsink in such a way that minimises the chance of creating “air bubbles” (air has a bad thermal conductivity). So the problem is that very often, the stock thermal paste is applied in factories in ridiculously large amounts, that often spread out of the die of the CPU and that most certainly achieve the opposite effect by slowing down, instead of facilitating, the transfer of heat from CPU to heatsink. Sadly, Apple doesn’t seem to be any different from other manufacturers from this point of view, despite the higher prices and the generally wonderful design and construction quality. Plus, often the stock thermal paste used by some manufacturers is quite cheap, and not based on some very efficient thermally conductive material.
In the past, I have almost always reapplied the thermal paste in my computers and replaced the stock paste with something better (especially with desktops that I liked to overclock) very often with great results, but in this particular case, having purchased the very expensive Apple Care cover together with the laptop, ideally I didn’t want to void the warranty.
Disassembling the laptop, removing the thermal paste and reapplying it, then reassembling the laptop… obviously doesn’t fit in Apple’s description of “user replaceable parts” (only hard drives and memory can be replaced / upgraded on Macbook Pros by the owner without affecting the warranty).
Having said that, I had already opened my MBP, previously, not only to upgrade the memory and replace the HDD with an SSD, but also to replace the optical drive with a cheap version of the OWC Data Doubler I found on Ebay, so that I can use the ultra speedy 240GB SSD for OS and applications, and at the same time have the stock 500GB HDD installed as additional storage for iTunes and iPhoto libraries, and that kind of stuff that takes a lot of disk space.
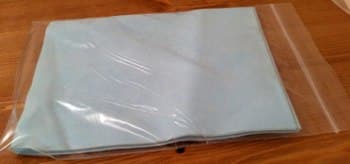
I am not sure of how likely an Apple employee could notice that I have also replaced the optical drive with the data doubler, if I were to bring the laptop to an Apple Store after restoring its original configuration, but I am aware that my warranty is already virtually void. So I didn’t really want to waste a lot of time by bringing the laptop back to its original state, just to be able to bring it in and try to get some Apple employee to replace the thermal paste due to heat issues… too much hassle, plus from reading the Apple Support Communities, it looks like only very a few people have managed to get this done by Apple, and in all cases the job was done as poorly as in the factory, or even worse. So, I just decided to do it myself, and therefore I purchased the best thermal paste available at the moment, the IC Diamond 7 Carat – you can find a small syringe on ebay for a few quids. Here’s how the syringe looks like:
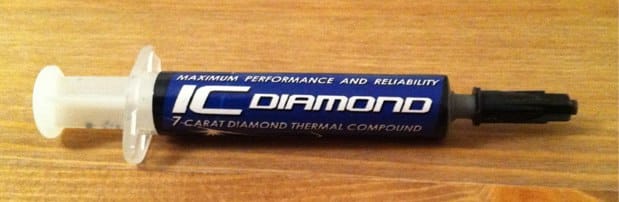
As the name suggests, the IC Diamond is a special thermal paste in that it contains 92% pure Diamond, which has a much better thermal conductivity than materials such as the silver used in other popular types of thermal paste like the Arctic Silver 5. Besides the great thermal conductivity, another great advantage of such a thermal paste is that it is not electrically conductive, so it’s not as risky to use as the silver based ones. Unfortunately though the IC Diamond is a very hard paste and it can be tricky to apply, especially on laptops where heatsinks are very light; I would likely recommend this kind of thermal paste more for desktop computers than for laptops for this very reason. On desktop computers, the best way of applying a thermal paste is to place a pea-size amount of paste on the middle of the CPU’s die, and let some heavy heatsink press and spread the paste evenly across most of the surface of the die… on laptops, due to the heatsinks being very light and due to the light pressure when they are fixed against the CPU, this technique would not work well, especially with such a hard thermal paste like the IC Diamond. Therefore in these cases, the easiest way is to just spread a small amount of paste manually across the surface of the die (I usually use an old credit card or something similar) until a very thin layer of paste covers the whole surface. This won’t ensure that no air bubbles will be produced between the CPU and the heatsink, but works fairly well in most cases. Alternatively, you may want to use something like the Arctic Cooling MX-4, which is another pretty efficient thermal paste (albeit not as efficient as the IC Diamond on paper) and is also not electrically conductive, plus it is a lot easier to apply than the IC Diamond.
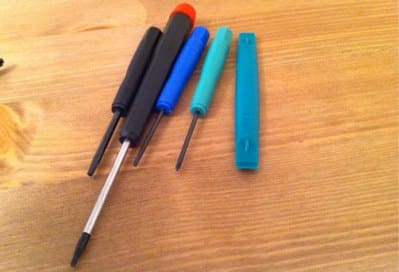
If you are experiencing the same kind of heat-related issues with your own MBP, and want to try and reapply the thermal paste – provided you are well aware that this will virtually void the warranty, if any – I’d recommend you to get some proper screw drivers first. I don’t have any particular set of tools with me, but I usually use these screw drivers that I got when I purchased the OWC SDD, and they are great for laptops (note the little bluish tool on the right, this is very useful with Apple’s ribbon cables):
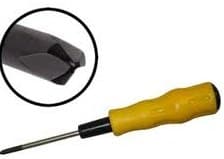
The only problem I had when I disassembled my MBP was removing the battery: apparently Apple has changed again the screws used for the battery and in my case I had to purchase a tri wing screw driver from Maplin like the one in the picture to be able to remove it:
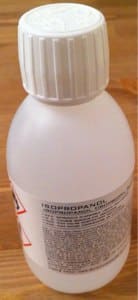
I didn’t need any other tools, apart from some alcohol – I use Isopropanol – and some lint free cloth to properly clean both the CPU and the GPU after removing the old thermal paste and before reapplying the new one:
Besides tools, you obviously need to be a little patient and have steady hands if you go the same route and want to reapply the thermal paste. It’s not a really complicated operation, but – perhaps needless to say – you must be very careful. And did I mention that this will void your warranty, if any? (I warned you)
Before jumping to the results, here’s a few more pics of my laptop while I disassembled, so that you can get an idea of what to expect from the inside if you have never opened a MBP – if you aren’t sure of how to remove the back cover of your MBP, please stop here 🙂
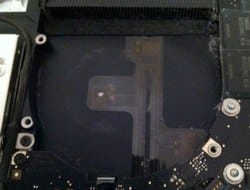
Inside
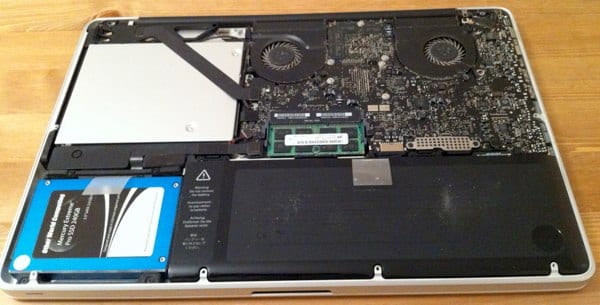
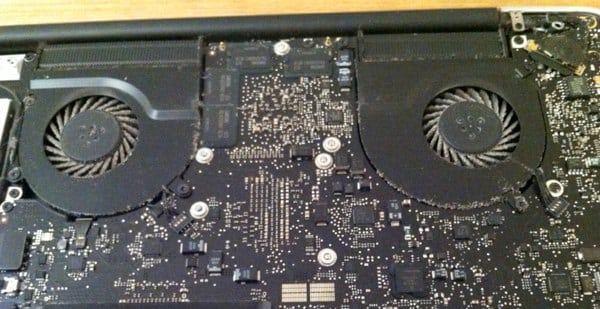
You can see that my laptop was quite dusty inside. This is kinda important: because reapplying the thermal paste will void your warranty, I recommend you first try by cleaning up all the dust especially from the fans. If too much dust and dirt is preventing the regular air flow, you might be shocked to see the difference that just cleaning the fans might make with regards to the temperatures! In my case I saw a drop of 5C or even more just after cleaning the fans.
Dusty fans
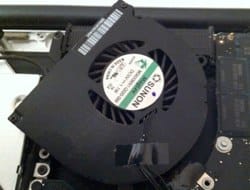
Fans after some cleaning
The battery
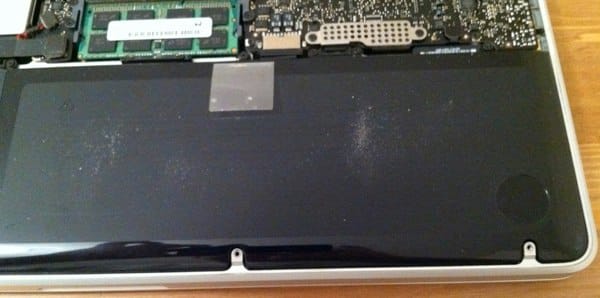
Depending on the model it may be a bit annoying to remove and require a special screw driver (a tri wing in my case).
The logic board
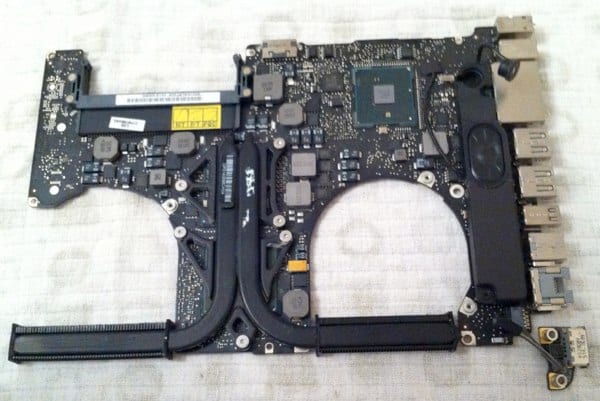
To reapply the thermal paste, you need to remove it from the case of the laptop. It’s nothing complicated, but you do need to be careful with the small ribbon cables here and there.
Before…
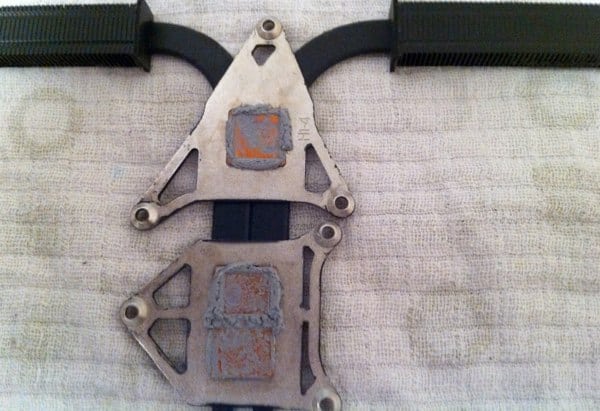
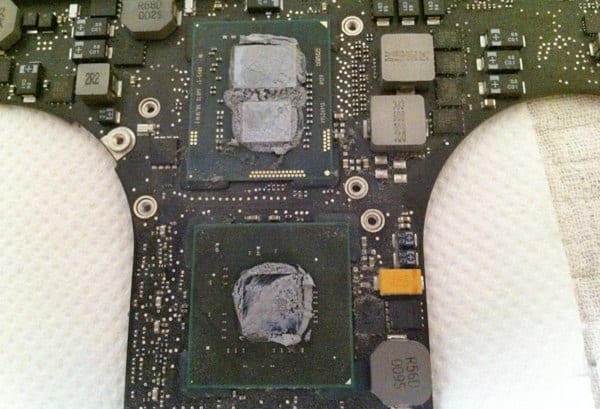
This is how the CPU, the GPU and their heatsinks looked like before cleaning up and reapplying the thermal paste. You can see how ridiculous large amount of compound had been applied, and how poorly the application was made. No wonder both my CPU and GPU were choking due to the heat!
Spring cleaning…
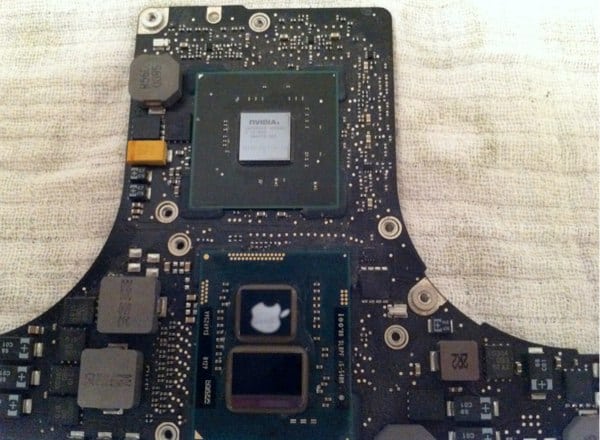
And this is instead how CPU/GPU (I forgot to take a pic of the heatsinks at this stage) looked after removing the old thermal paste and cleaning up properly with the Isopropanol. Funny…you can see that the CPU was so clean that the Apple logo of my iPhone – which I used to take the pictures – was reflected on its die!
After…
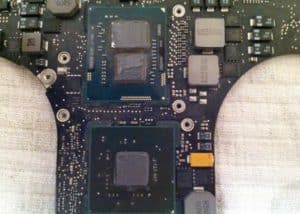
Finally, this is how the chips looked like after carefully applying the new thermal paste with a credit card. It’s definitely not my best application, but the IC Diamond was so hard! I would probably have used the Arctic Cooling MX-4 if I had known the IC Diamond was so difficult to apply. I don’t think I would have seen a massive difference between the two, after all, despite the theoretical difference would suggest otherwise.
Amazing results!
Reapplying the thermal paste can yield different results depending on various factors (how good the stock paste is, how well or badly it has been applied, which other thermal paste you want to replace it with, and how well you apply it). In my case, the results were pretty amazing!
Light load
As said earlier, the temperature of my CPU was most of the time at least 85C with light load or even in idle; under heavy load, temperature would rise to 95C max and the system would then be slowing down badly due to the CPU throttling. This is how my Activity Monitor looked like most of the time:

You can see kernel_task and its ridiculously high CPU utilisation in a moment when I was just surfing the web with Safari (nothing else), and even with Flash disabled!
After reapplying the paste, everything changed: the average temperature of the CPU was always just above 50C – more than 30C drop! – with the same light load or even more (web browsing and a few more things running at the same time), with the fans running always at the minimum speed of 2K RPM!

This is when the laptop is plugged in; when I use in on battery, I haven’t yet seen the temperature of the CPU go above 30C !!
Heavy load
The difference is even more noticeable under heavy load. Before, when running some video encoding tasks with Handbrake kernel_task would use up to 350% CPU, slowing down Handbrake a lot. Now, this is what I see after reapplying the thermal paste:
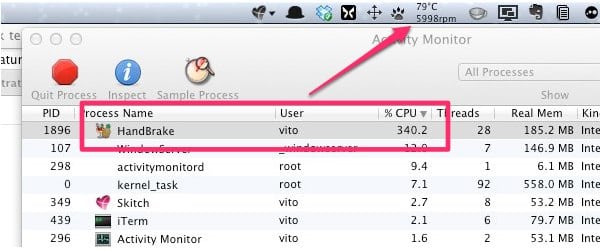
See kernel_task? It’s completely gone, basically – it only appears from time to time for its normal stuff but it no longer shows a ridiculously high CPU utilisation. Needless to say, the encoding is much, much faster now and as you can see it is Handbrake that uses the CPU! I can even do other things like web surfing or coding/testing at the same time, all works great as it should. Before, I could basically forget about doing something else while video encoding.
And look at the temperature! Video encoding is one of the most CPU intensive tasks, yet with the fans at 6K RPM I haven’t seen the CPU going above 80C.
This is a massive improvement. My laptop feels a lot snappier now, it almost feels like a CPU upgrade and it is finally almost silent when I do anything other than video encoding. I am definitely happy about the improvement and would definitely recommend the same “fix” to others who may be experiencing the same issues. It’s cheap, it doesn’t take longer than 30 minutes overall and you just need to be a little careful. Remember about the warranty though!
 I am passionate about WebDev, DevOps and CyberSecurity. I am based in Espoo, Finland, where I work with the backend team at